Screen groups & sync groups
Groups help you bring order to a long list of screens, e.g. all displays of your branches or points of sale under one name. With a sync group, several displays play the same content at the same time.
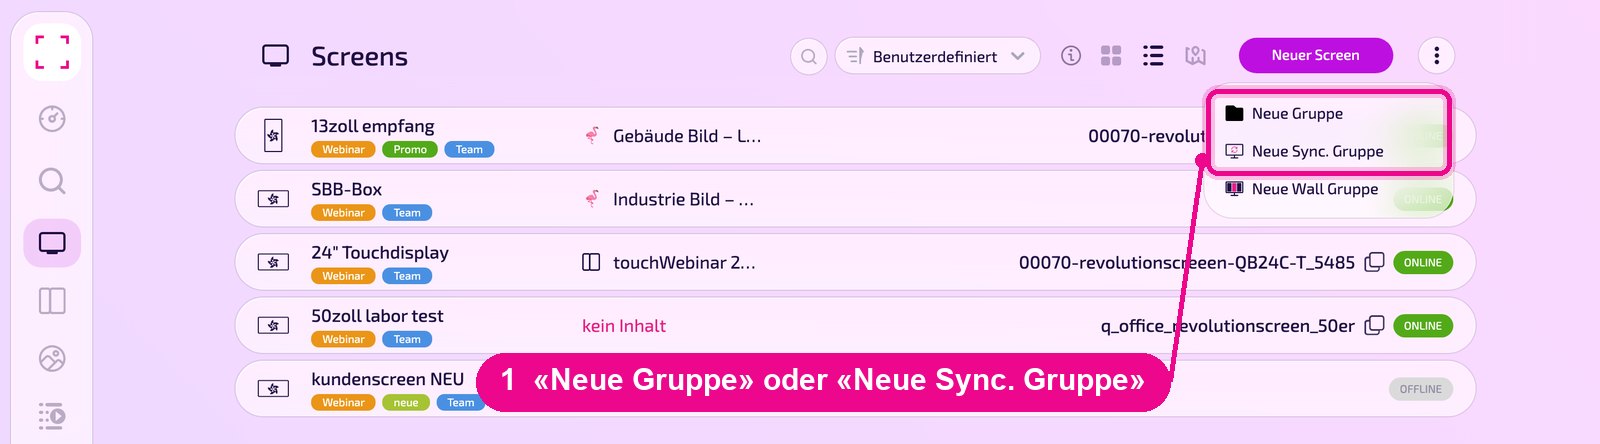
Sidebar on the left → «Screens» → menu ⋮ at the top right
Group or sync group?
- Group: pure grouping in the screen list. Each display in the group can play its own content.
- Sync group: all displays in the group run synchronously and show the same content at the same time.
If content should span multiple displays, you need a Display Wall. See «Display Wall erstellen».
Create a new group
In the screen list, click the menu ⋮ at the top right and select «Neue Gruppe» (new group) or «Neue Sync. Gruppe» (new sync group).
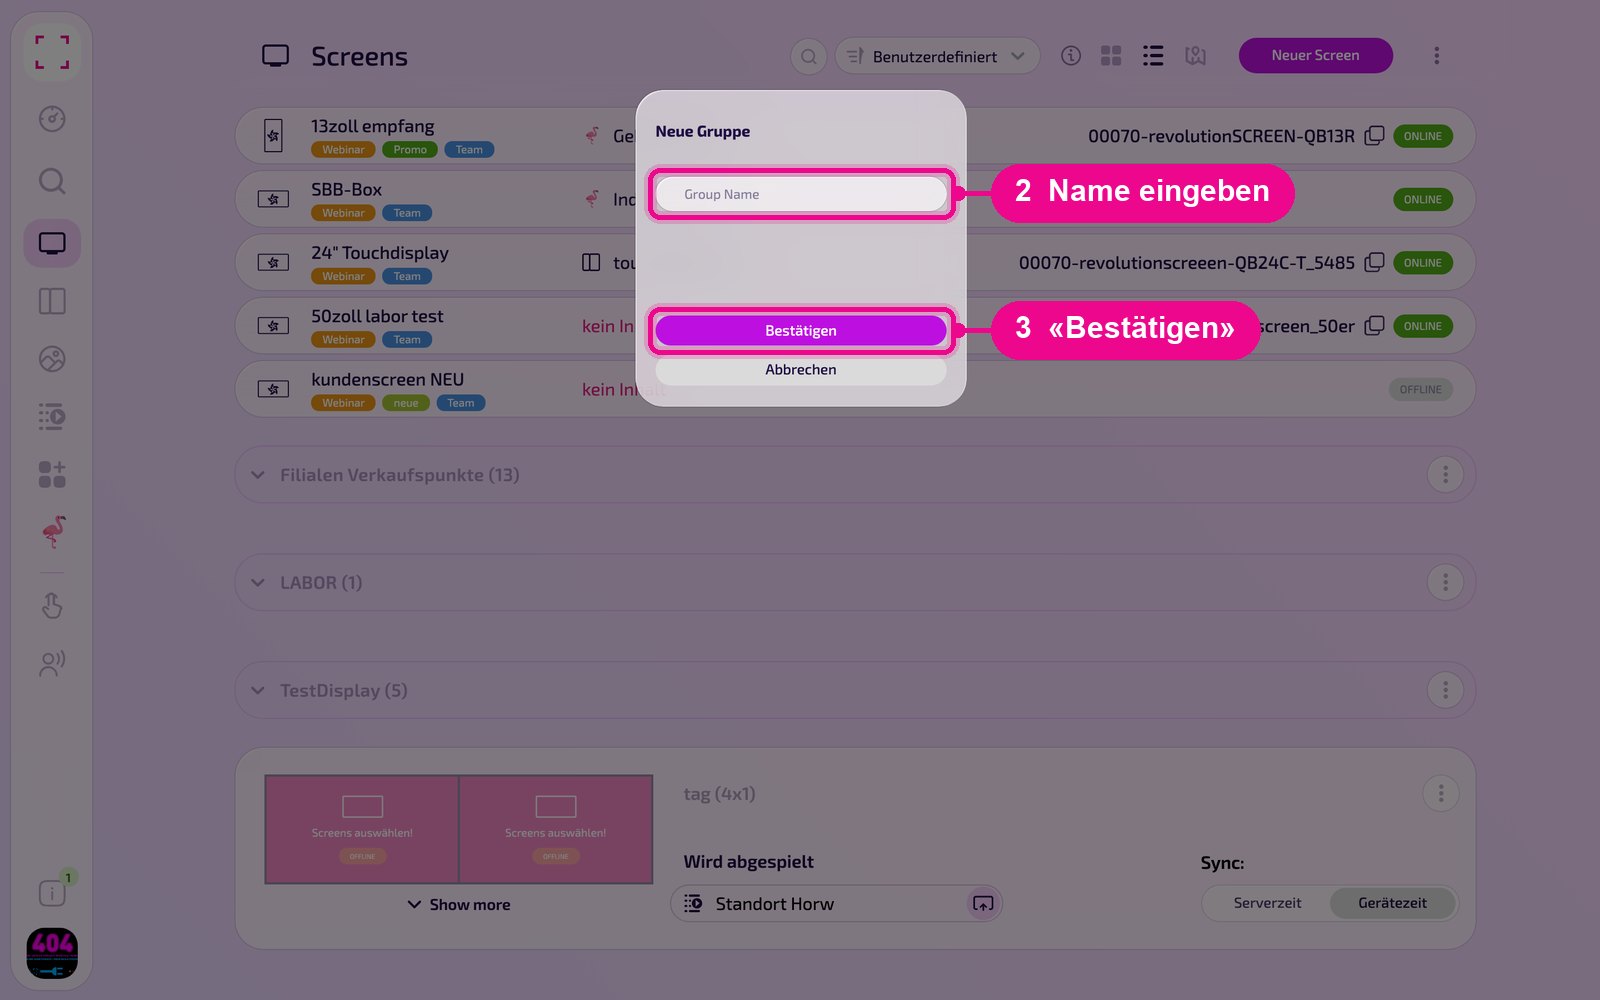
In the «Neue Gruppe» window, enter a name and click «Bestätigen» (confirm). Use «Abbrechen» (cancel) to close the window without creating anything. The window looks the same for both group types.
Expand and collapse a group
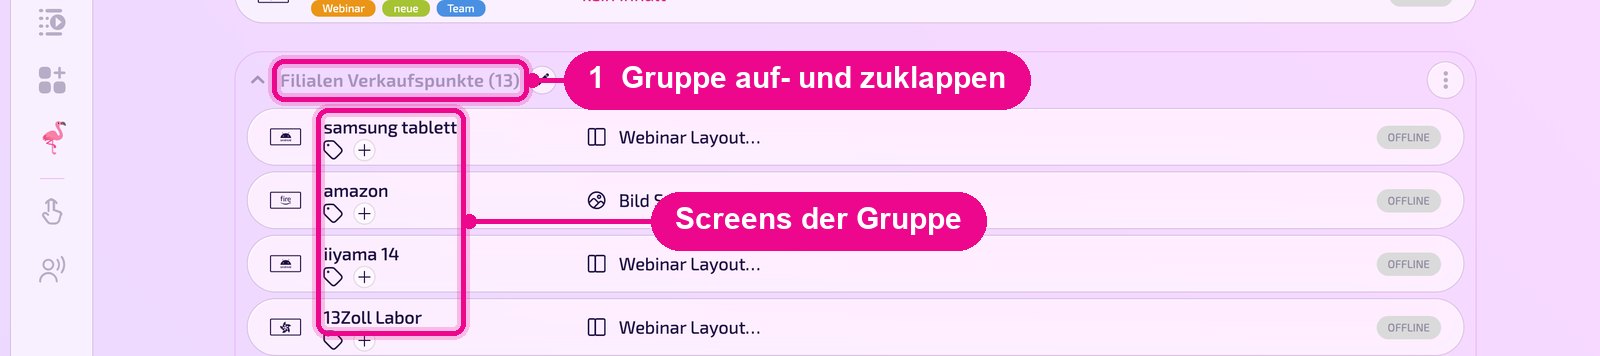
Groups appear in the list below the individual screens. The number in brackets shows how many screens belong to it. Clicking the group name expands the group and shows its screens; a second click collapses it again.
Content for a whole group
The menu ⋮ on the right in the group row offers two commands: with «Auf den Screen» (to the screen) you assign content to all screens in the group. With «Gruppe löschen» (delete group) you remove the group.

Before «Gruppe löschen» (delete group), check which screens are in the group. Expand it briefly to do so.
Assign a screen to a group
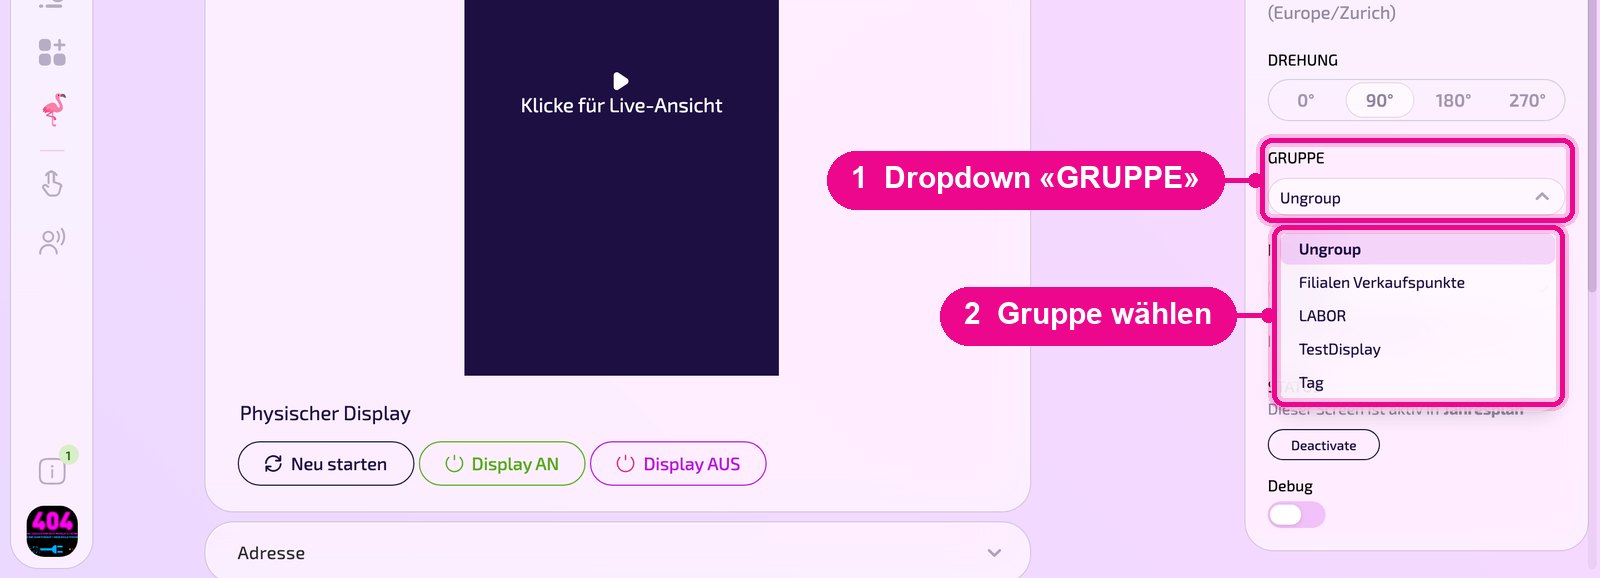
Open the screen in the list. On the detail page, click the selection field under «GRUPPE» on the right and choose the group. The entry «Ungroup» means: no group. This is also how you remove a screen from a group again.
Good to know
- A screen always belongs to at most one group.
- Group names such as «Filialen Verkaufspunkte» appear in the «GRUPPE» selection field of every screen.