Create a layout
A layout divides the screen into several sections. For example, a logo runs at the top, a campaign in the middle and a weather bar at the bottom, all at the same time. Each section gets its own content with its own duration and its own schedule.
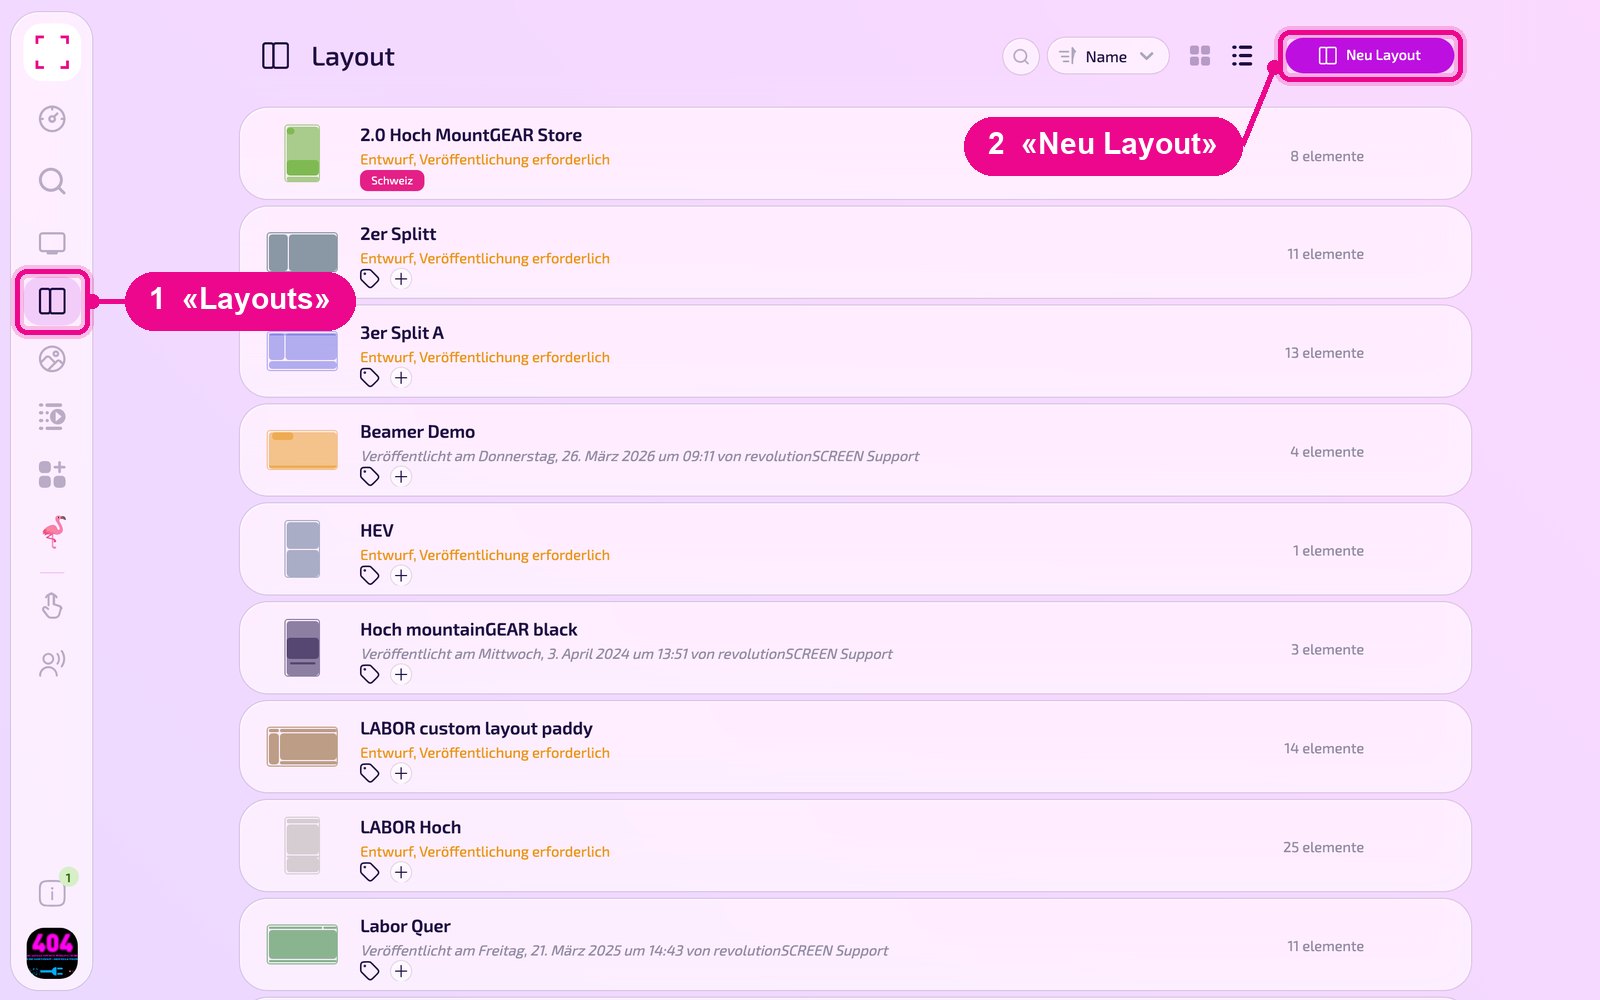
Sidebar on the left «Layouts» → top right «Neu Layout» (New layout). You open an existing layout by clicking on its row.
Create a new layout
Open «Layouts» in the sidebar and click «Neu Layout» (New layout) at the top right.
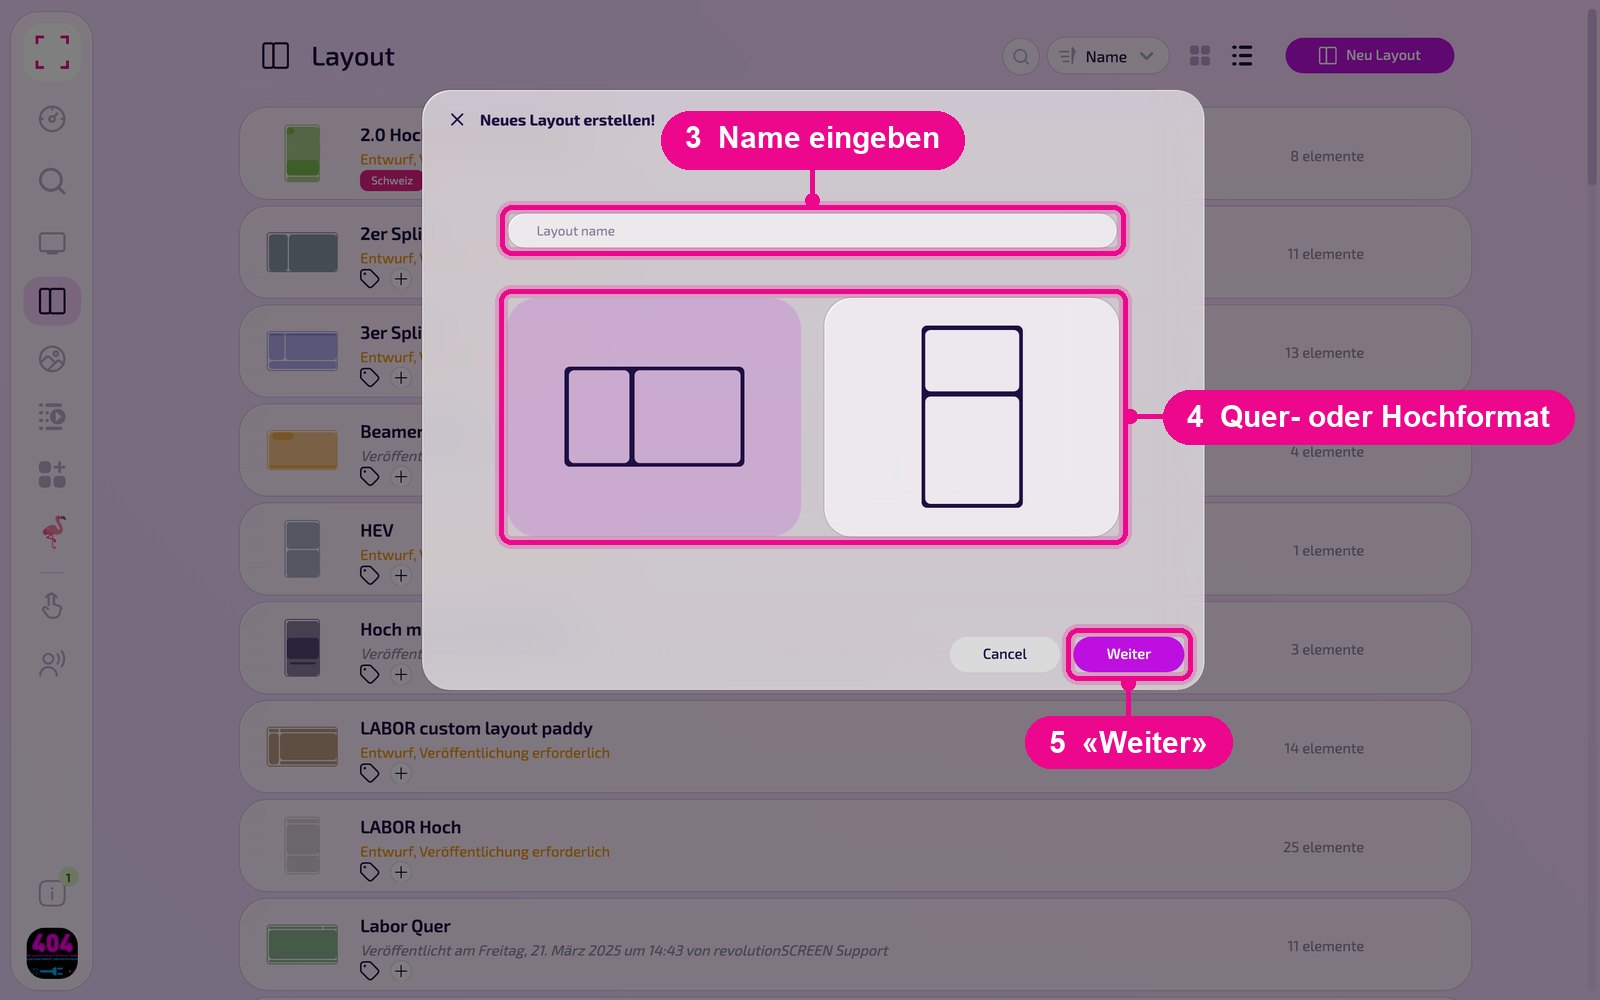
In the «Neues Layout erstellen!» (Create new layout) window, give the layout a name and use one of the two cards to choose landscape or portrait to match your display. Then click «Weiter» (Next).
After «Weiter» (Next), you select the templates. Choose the template whose layout fits best, e.g. a large main area with a footer. You can adjust the sections later in the editor at any time. Your own templates that you saved with «Save as Template» are also available here.
Choose a name that reveals the location and purpose, e.g. «Empfang quer» (Reception landscape). In the list you will later see a preview image, status and number of elements for each layout.
Divide the sections
The editor shows the live preview of the layout on the left, and a card for each section on the right. There you use «Links» (Left), «Top», «Breite» (Width) and «Höhe» (Height) in percent to set where the section sits and how big it is. The editor calculates the pixel dimensions below (w, h) itself. With «Hintergrund» (Background) you give the section a color.
To edit the content of a section, click the pencil in the preview or «Inhalt bearbeiten» (Edit content) on the card.
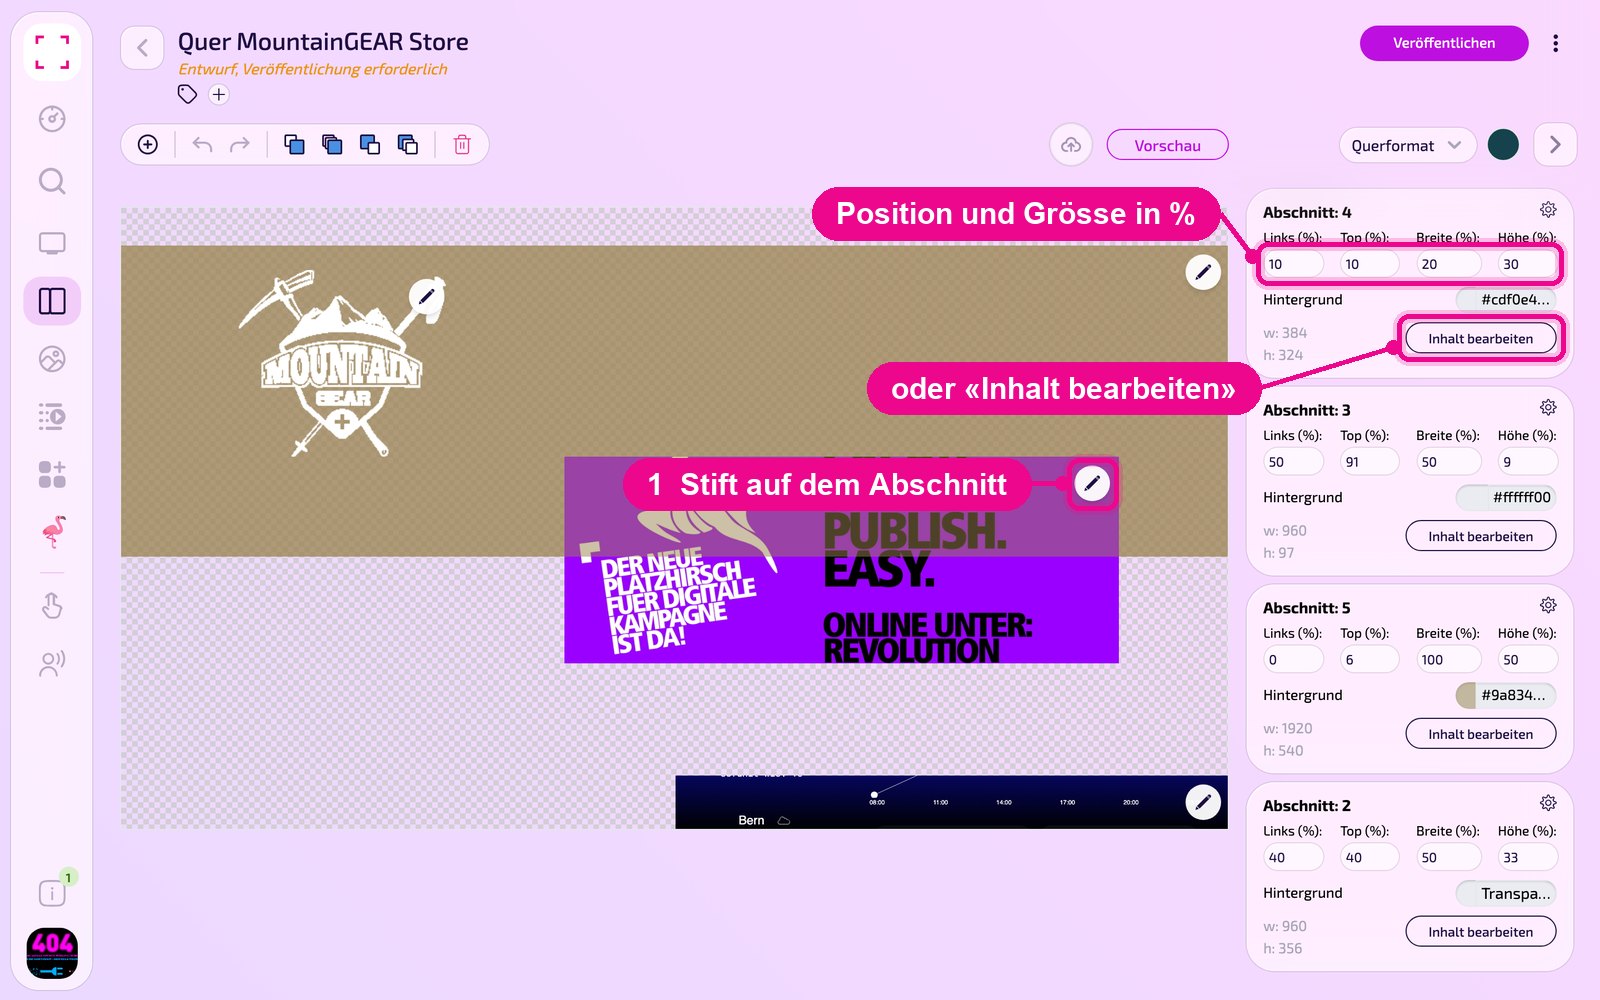
Using the round button next to «Querformat» (Landscape) you select the background color of the entire layout, and with the cloud icon next to «Vorschau» (Preview) you upload a background image. The arrow at the far right collapses the section cards so the preview has more space.
Place content into a section
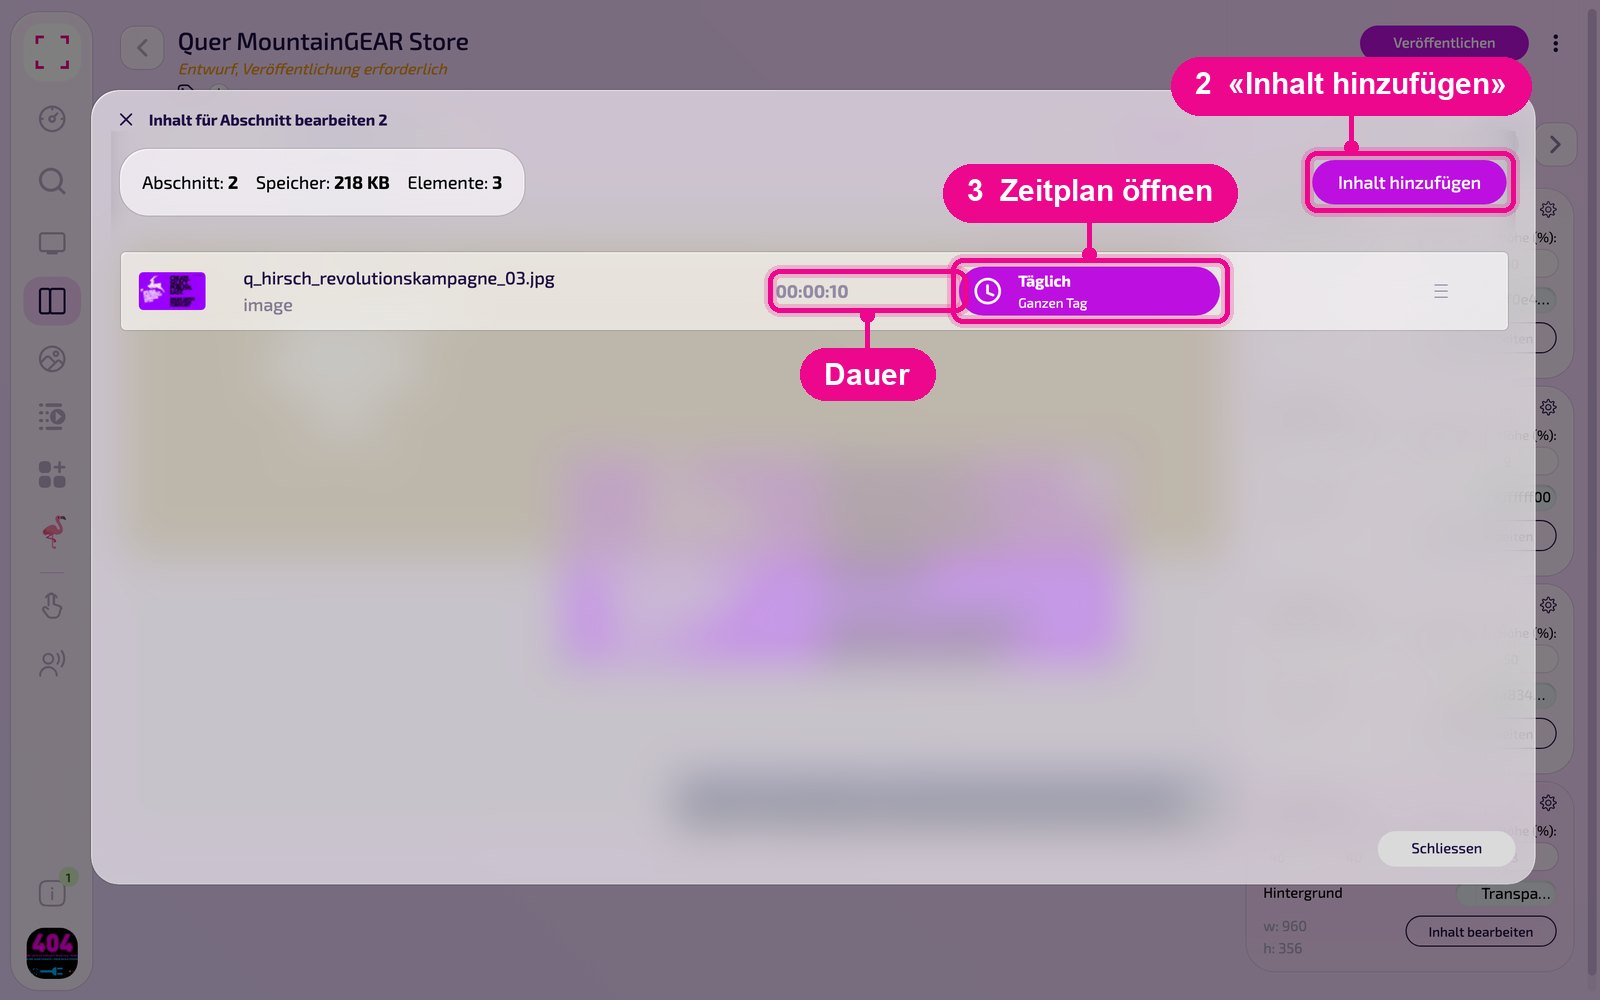
In the «Inhalt für Abschnitt bearbeiten» (Edit content for section) window you see all content of the section with duration and schedule. With «Inhalt hinzufügen» (Add content) you select more media, playlists, apps or designs. Clicking the duration opens the «Elementdauer bearbeiten!» (Edit element duration) window. You change the order with the handle on the right of the row.
All contents of a section that are currently valid run one after the other in rotation. How to set the display duration for apps with several entries is shown in each app guide in the «Anzeigedauer in Playlist & Layout» section.
Set the schedule
For a content item, click the schedule pill, e.g. «Täglich, Ganzen Tag» (Daily, all day). In the «Zeitplan» (Schedule) window you choose the weekdays, use «Einfügen» (Insert) to add a period with a start and end date, and set the time under «Abspielzeit» (Playback time). With «Sichern» (Save) you apply the schedule.
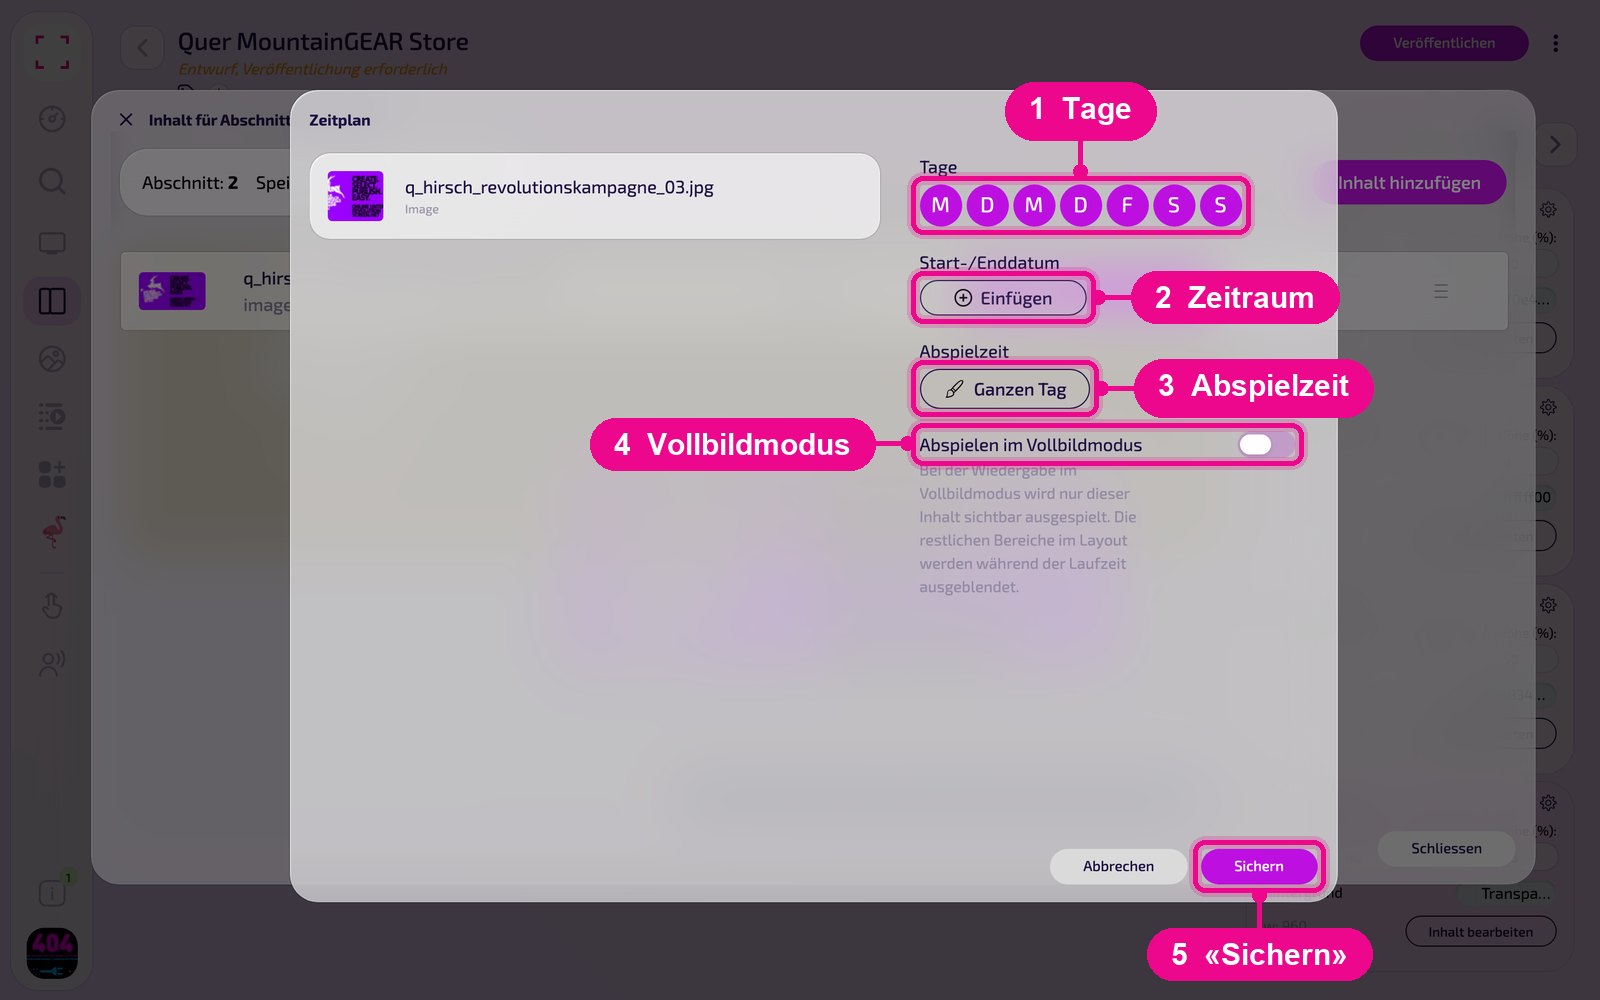
New in 3.0 is the «Abspielen im Vollbildmodus» (Play in fullscreen) toggle: as long as this content is running, it fills the entire screen and the other sections of the layout are hidden. This is suitable for important overlays such as a greeting or an announcement.
Should a display normally show, e.g., a video and only display an overlay at certain times? Then place the base content in the Emergency Channel and only the time-controlled overlays in the layout. If both are in the same section, they alternate. The solution step by step: «Video soll laufen, ausser während zeitgesteuerter Einblendungen».
Publish
Changes only take effect once you click «Veröffentlichen» (Publish) at the top right. Until then «Entwurf, Veröffentlichung erforderlich» (Draft, publishing required) appears under the name.
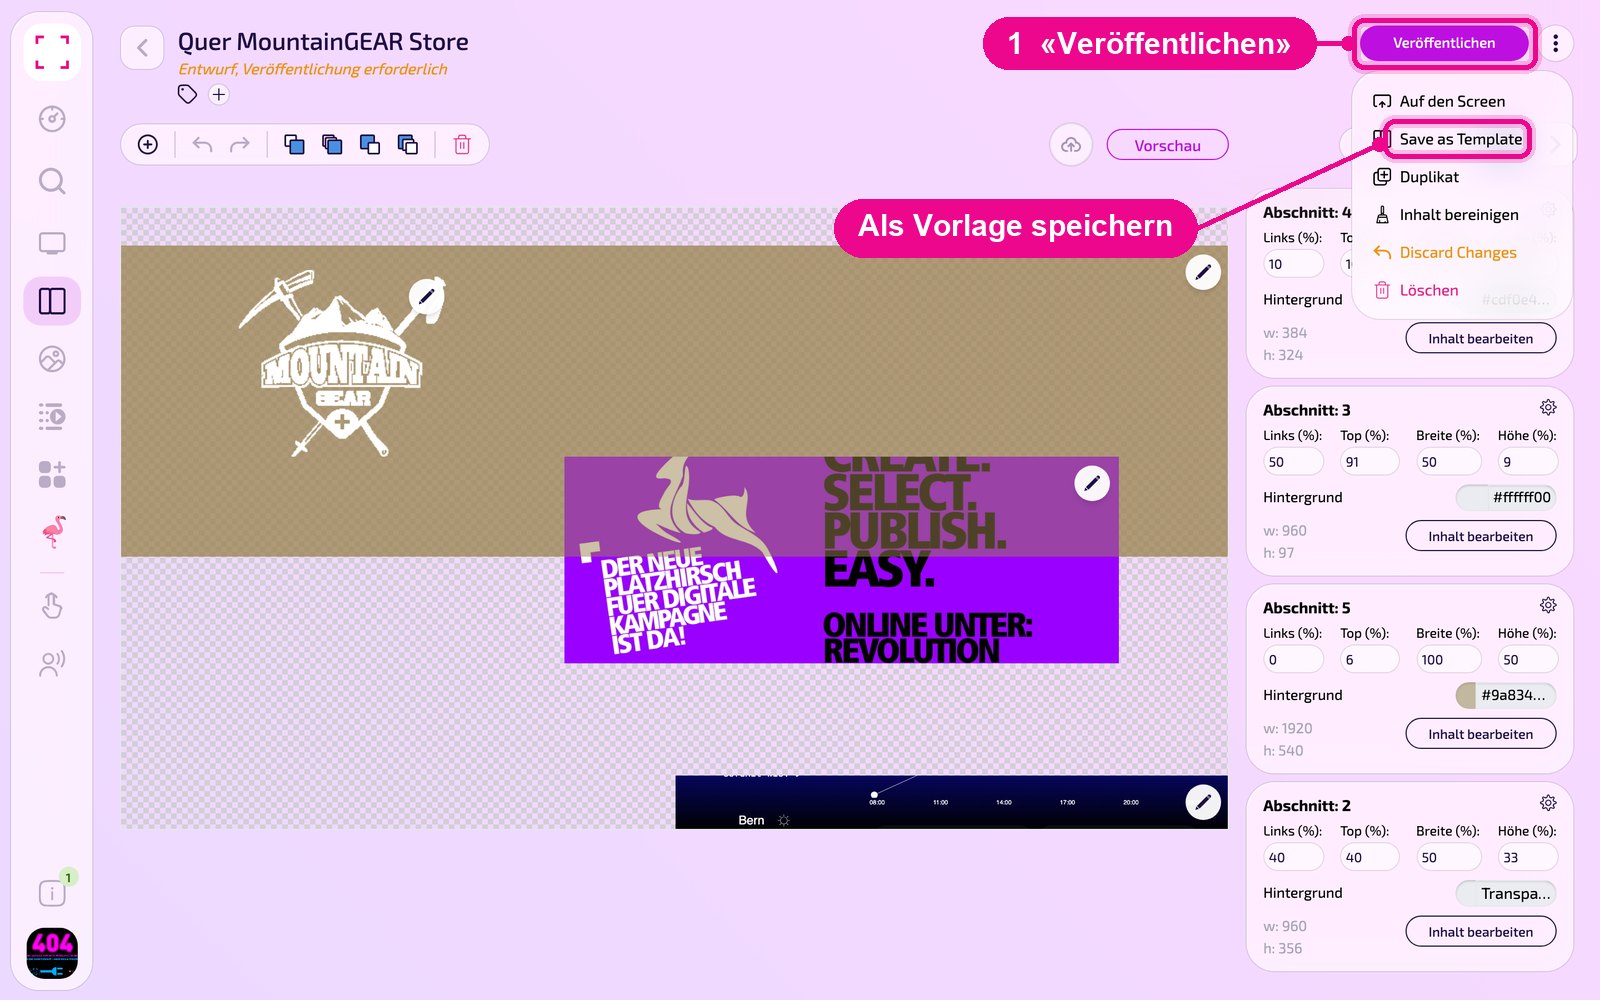
The three-dot menu next to it offers further functions:
- Auf den Screen: assign the layout directly to a display.
- Save as Template: save the layout as your own template to reuse it for further layouts.
- Duplikat: create a copy of the layout, e.g. for a second location.
- Inhalt bereinigen: removes elements with an expired date from the layout. The media and app instances themselves remain in the media library or in the app.
- Discard Changes: discard all changes since the last publish.
- Löschen: permanently remove the layout.
Good to know
Layout does not appear on the screen
Check whether the layout is published and has been assigned to the correct display under «Screens».
Sections do not fit the display
Check landscape or portrait and the percentage values. Adjacent sections together add up to 100 % width.
Section stays empty
Open «Inhalt bearbeiten» (Edit content) and check whether at least one content item has a schedule that is currently valid. Also pay attention to the playback time.
Reuse a layout arrangement
With «Save as Template» in the three-dot menu you save the arrangement as your own template.