Weekly Menu Board
With the «Weekly Menu Board» app you display the week's menu plan attractively on the screen, with dishes, prices and your own logo.
Purpose
Present the catering offer of a restaurant, canteen or cafeteria clearly on the display. You maintain the dishes directly in the app, for the current and the next week. Templates in a light or dark style match your appearance.
Applications
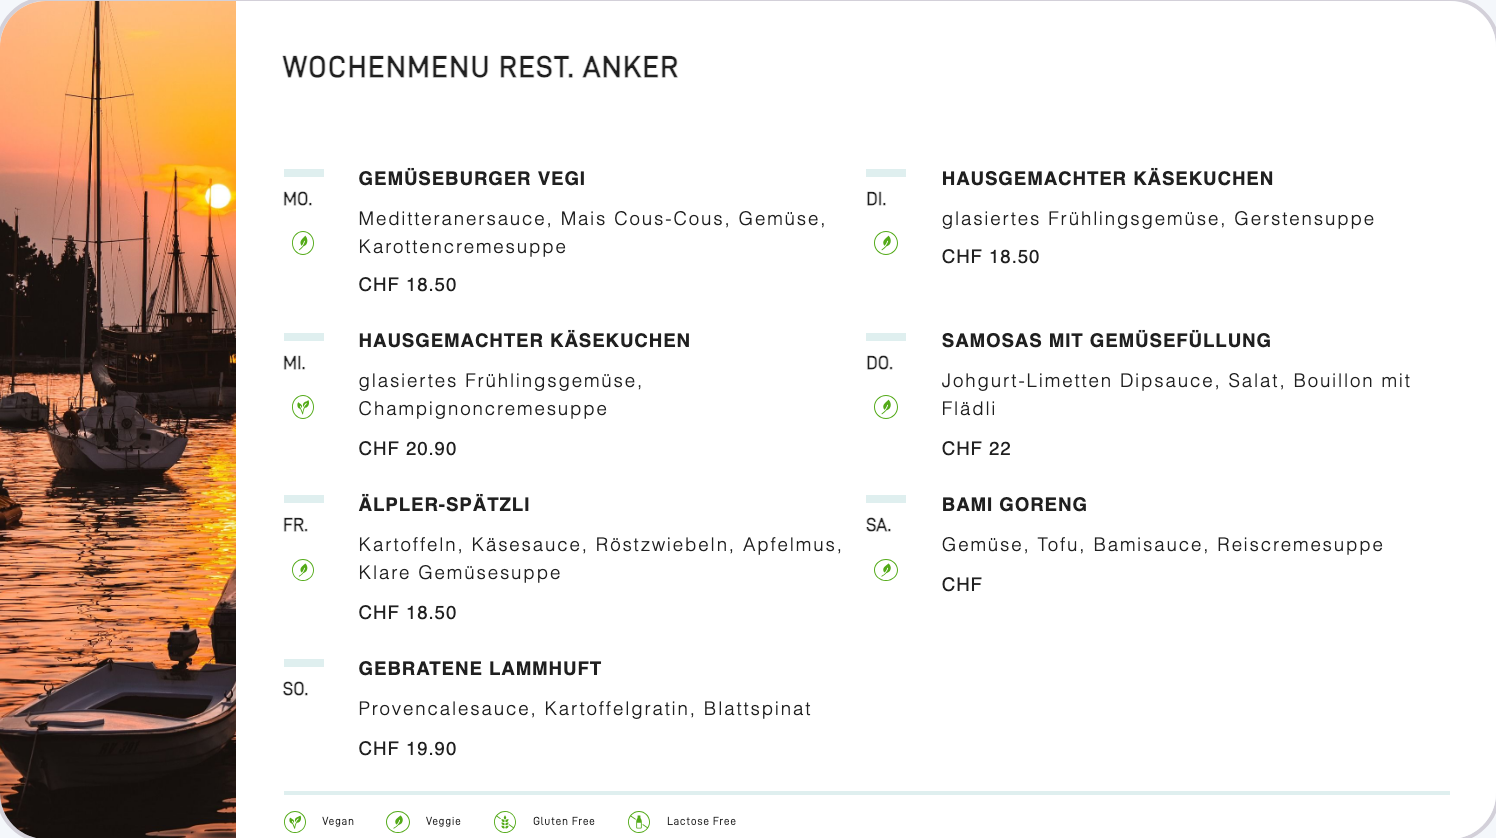
Here is how Weekly Menu Board looks on the screen, examples from real use:
Requirements
- An active revolutionSCREEN account with access to my.rstv.app.
- The week's dishes with description and price.
- At least one configured screen.
Install the app
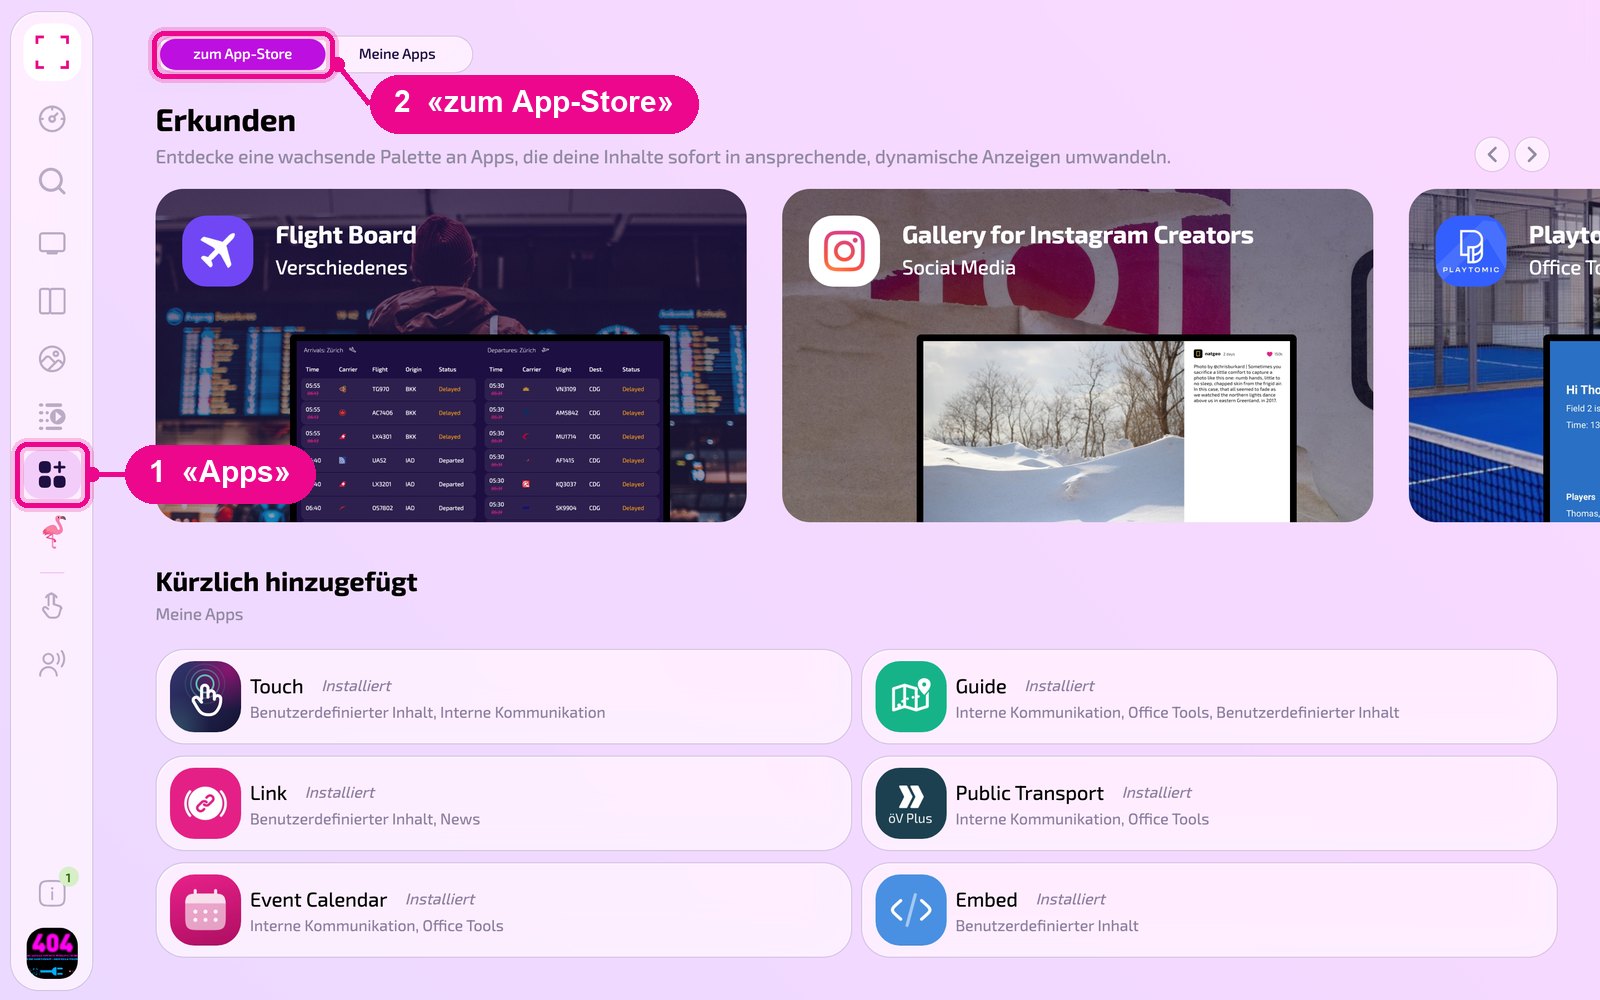
In the sidebar on the left, click «Apps» and at the top «zum App-Store» (to the app store).
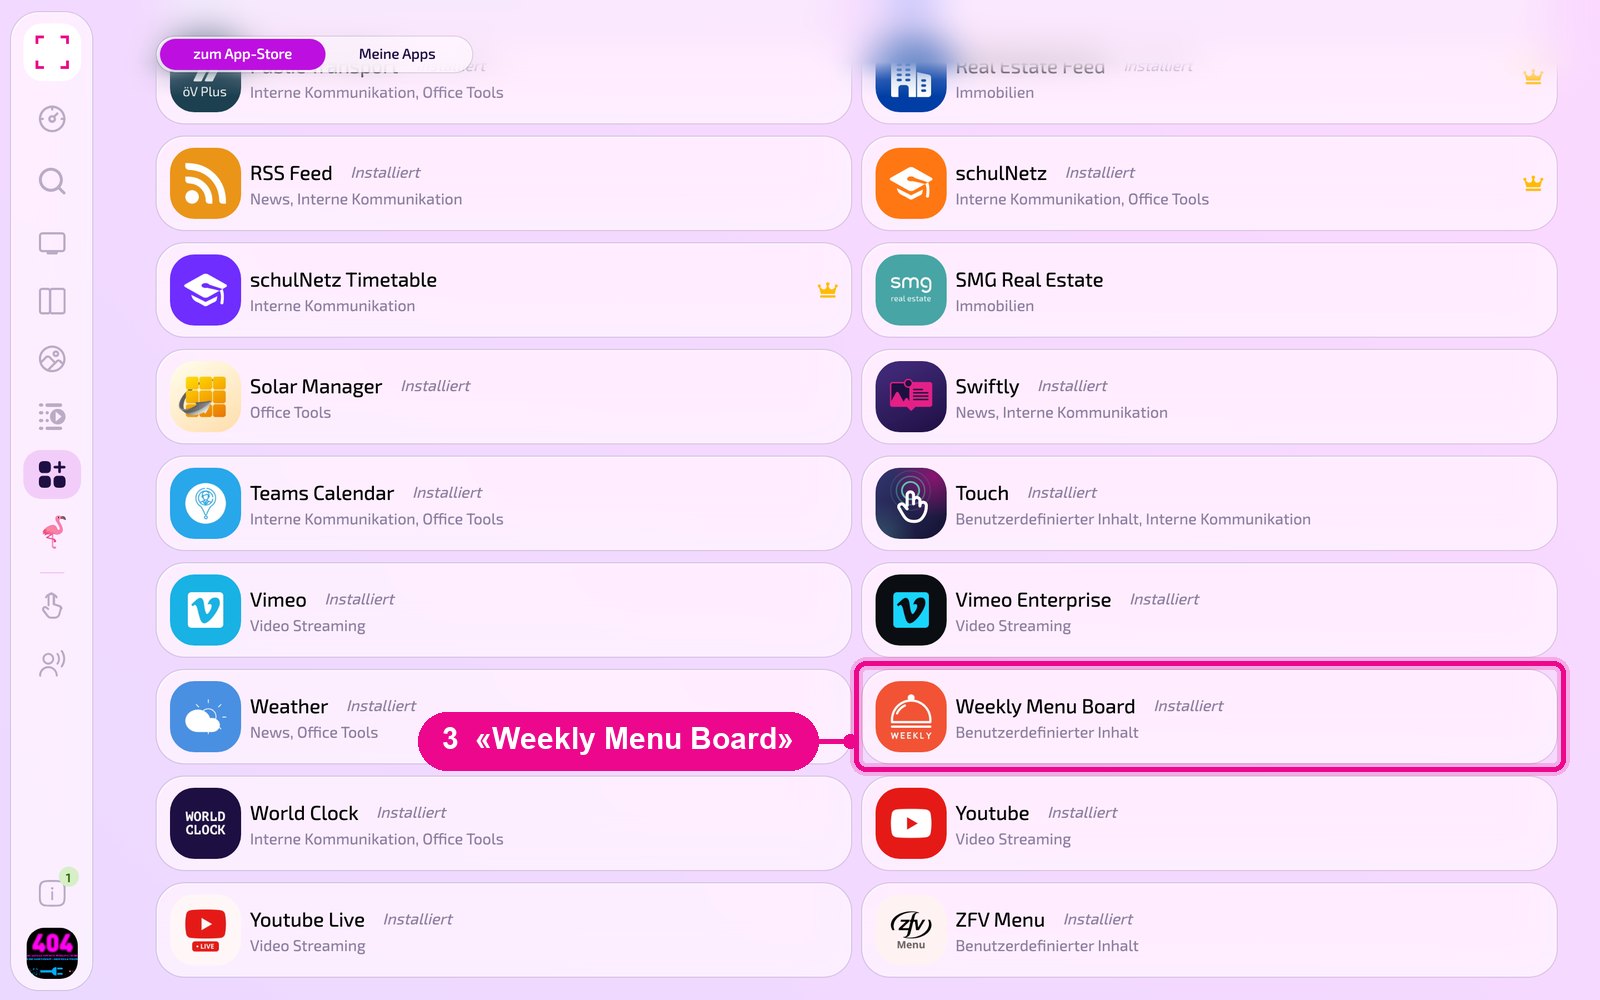
Scroll to the «Alle» (All) list and click the «Weekly Menu Board» tile. Use the category buttons to narrow down the list.
The app's detail view opens. If it is not yet installed, first click «Installiere» (Install). Then click «Neue Instanz» (New instance). «App Guide» opens a short guide.
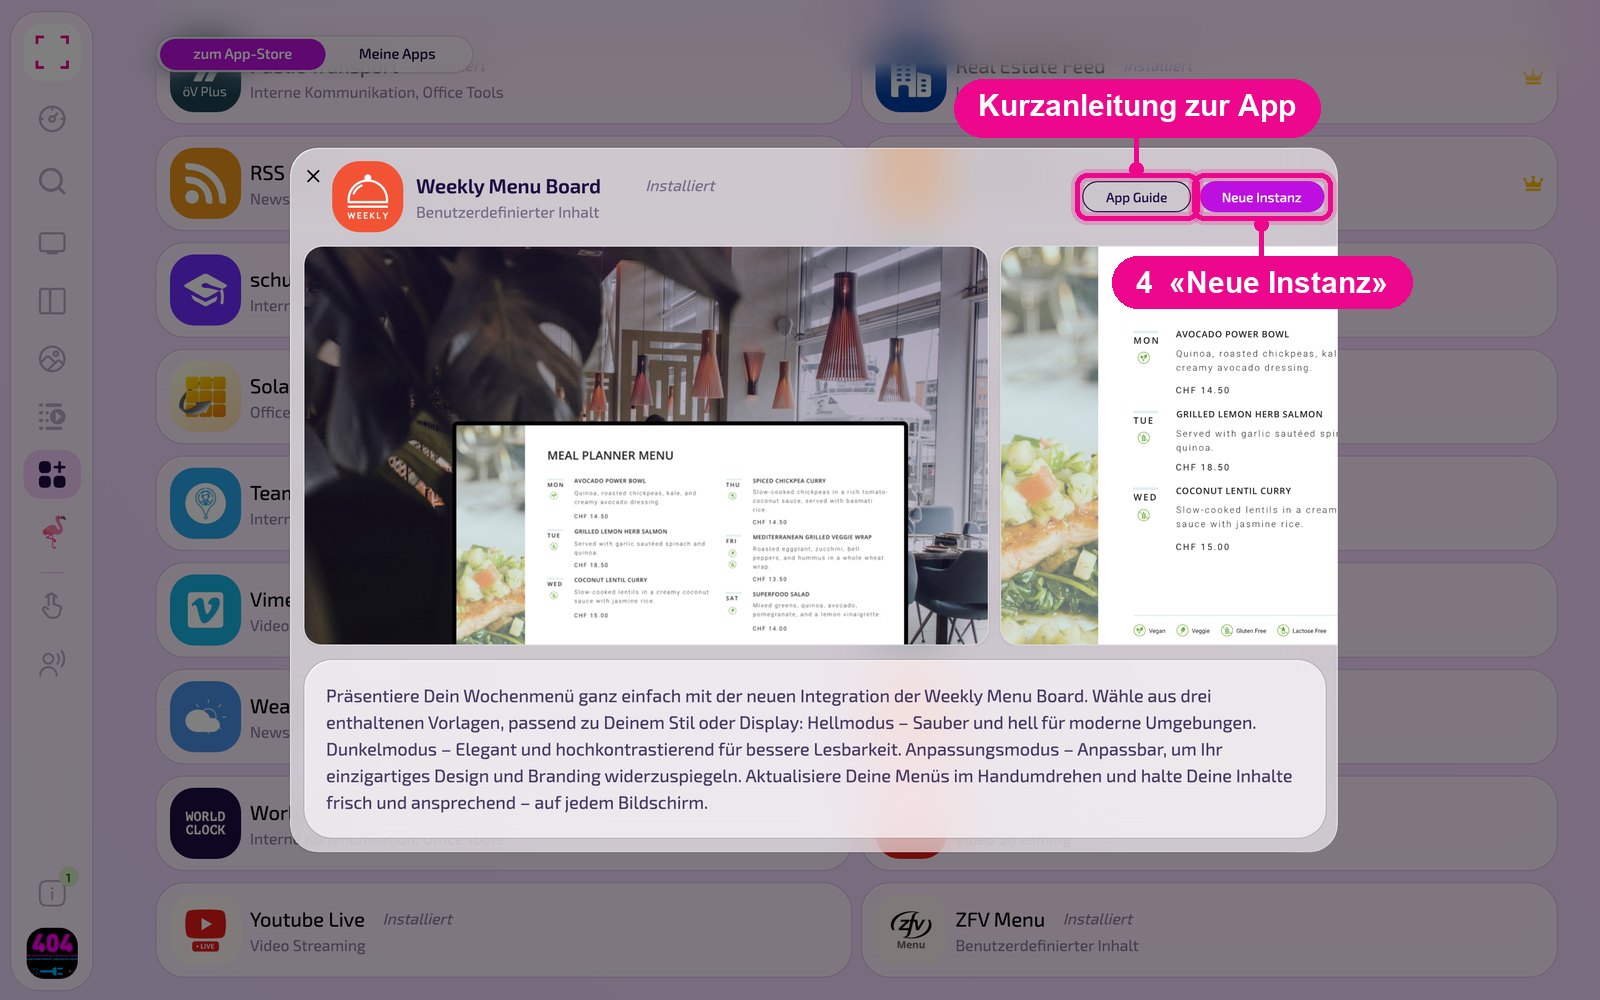
An instance is a separate configuration of the app, e.g. one gallery for reception and another for the canteen. You can create as many instances as you like and use each one individually on screens, in playlists or layouts.
Create a new instance
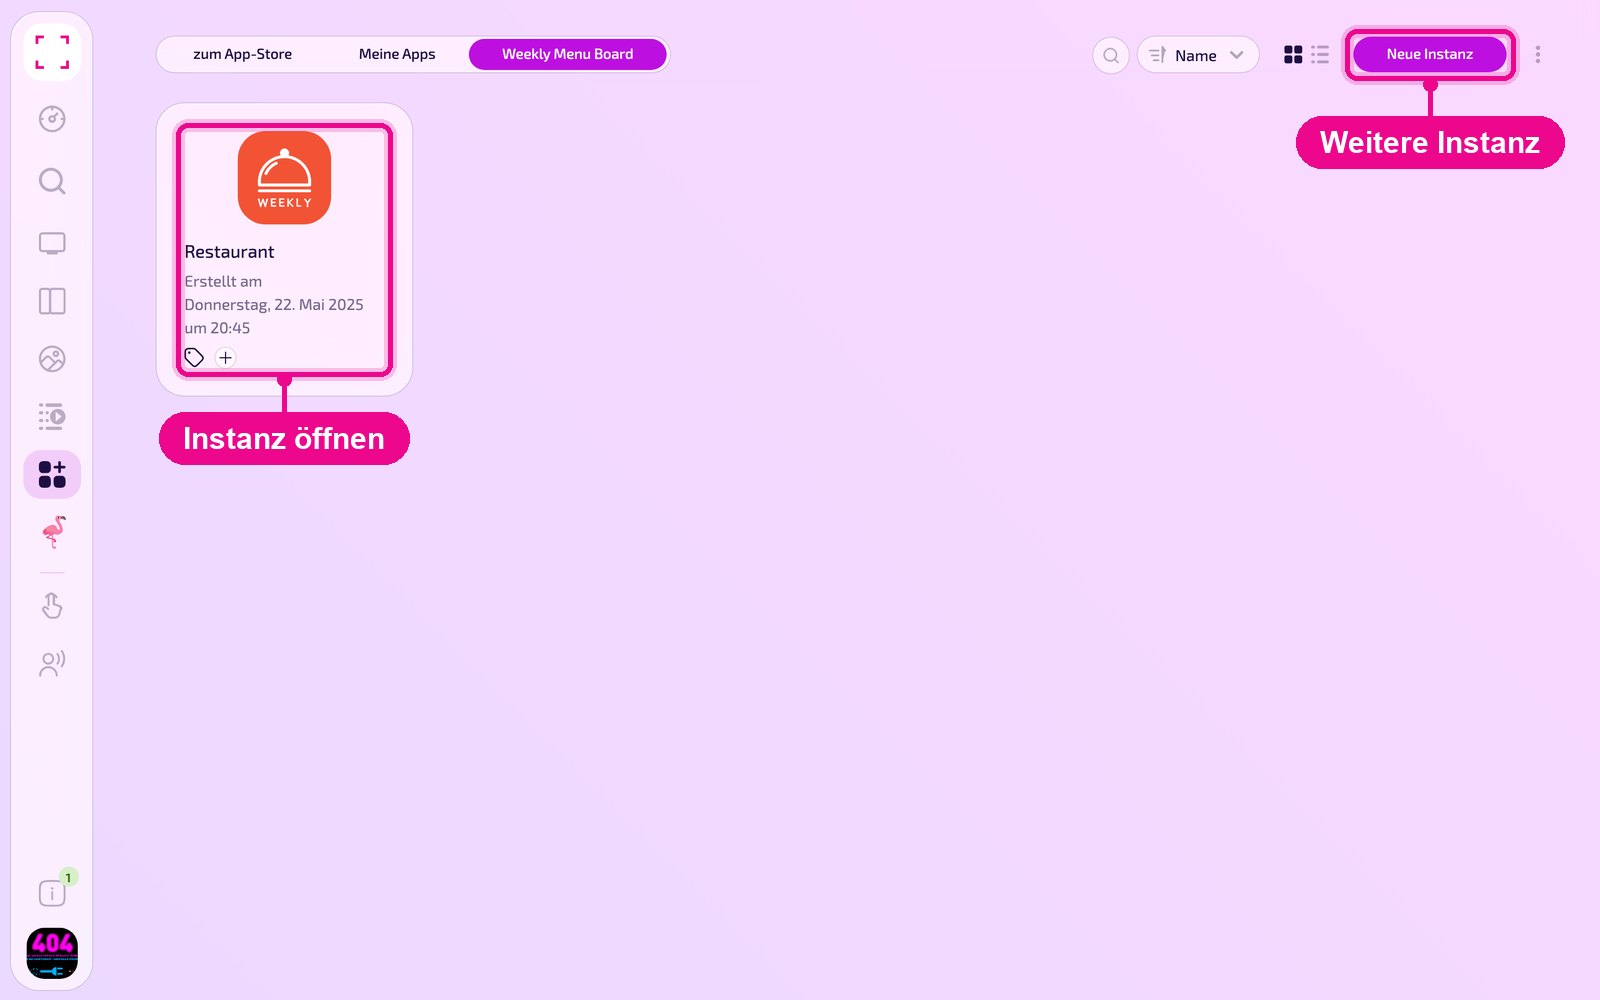
Under «Apps › Meine Apps» (My apps) you see all instances of the app as tiles. With «Neue Instanz» (New instance) at the top right you create another one, and by clicking a tile you open an existing one.
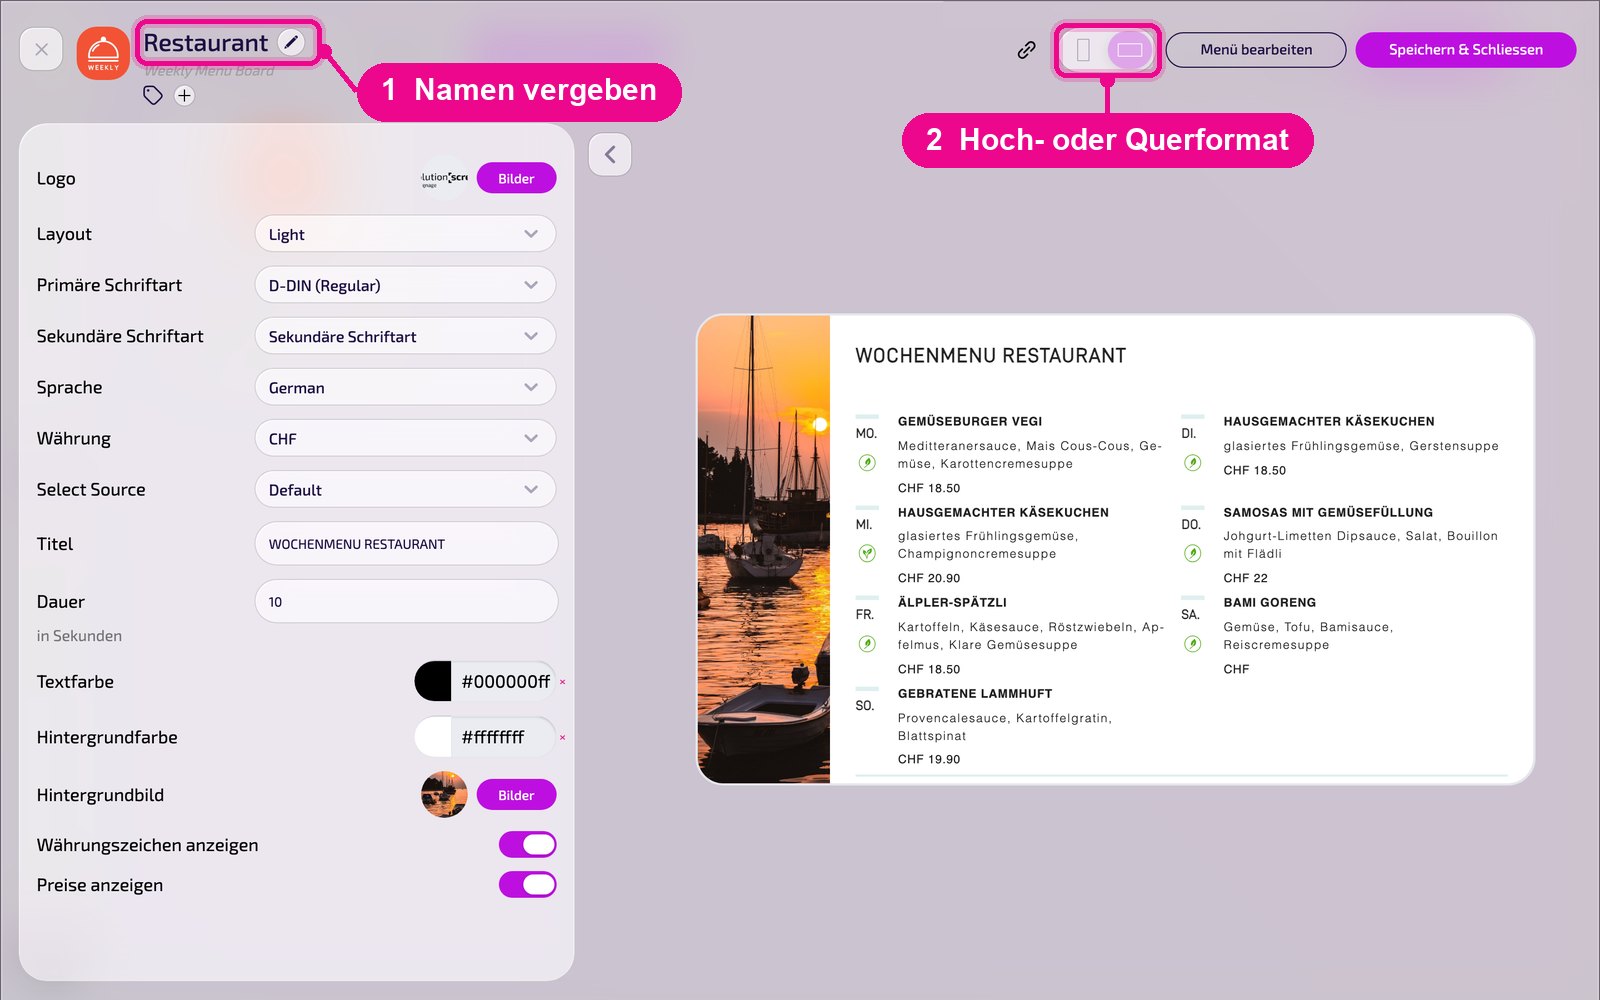
In the editor, hover over the title and click the pencil to give the instance a name. A new instance shows «Kein Name angegeben» (No name given) in red until then. At the top right you choose whether the preview appears in portrait or landscape format.
Enter the menu
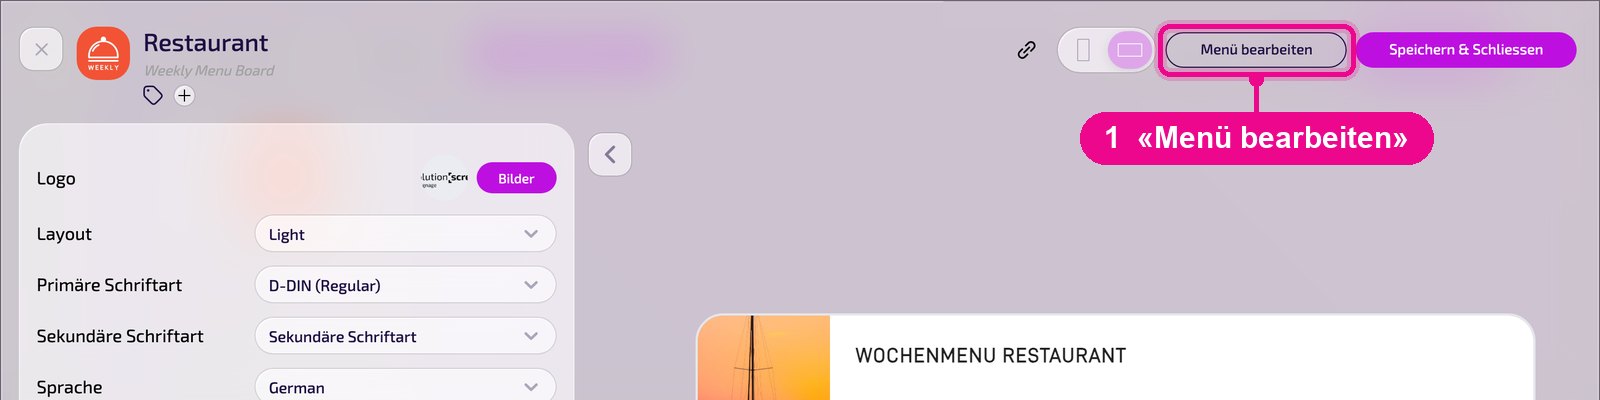
Click «Menü bearbeiten» (Edit menu) at the top right.
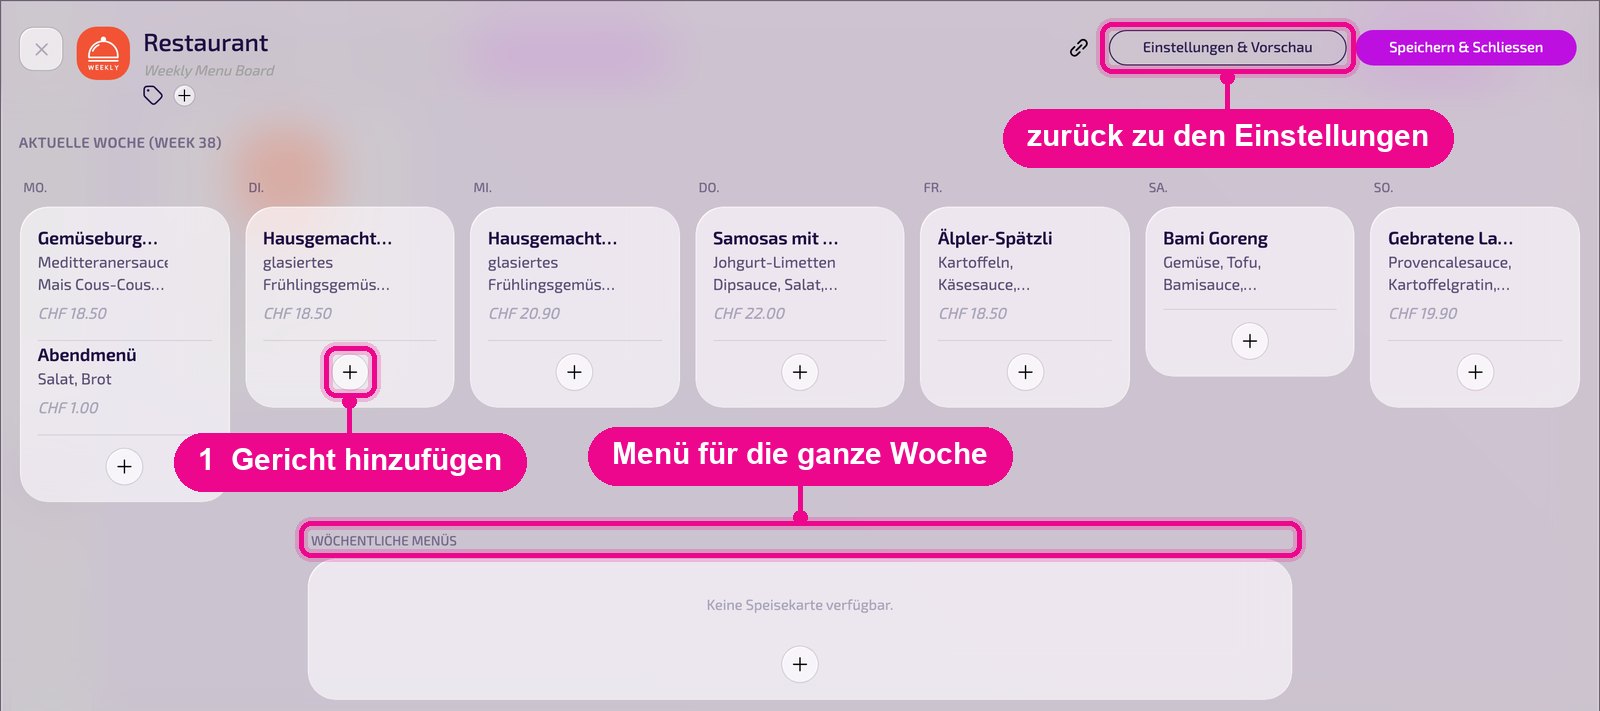
You see the current week with one column per day, below it «Wöchentliche Menüs» (Weekly menus) for offers that apply all week, and further down the next week. Use the plus below a day to add a dish. With «Einstellungen & Vorschau» (Settings & preview) you return to the settings.
In the «Hinzufügen» (Add) window you enter «Name», «Beschreibung» (Description) and «Anmerkungen» (Notes). Under «Preis» (Price) you enter a «Auszeichnung» (Label) and the «Betrag» (Amount), and with the plus you add another price. With the toggles you mark the dish, e.g. «Vegi», «Vegan», «Laktose Frei» (Lactose free), «Gluten Frei» (Gluten free), «Ausgewogen» (Balanced) or «Klimafreundlich» (Climate friendly). With «Sichern» (Save) you apply the dish.
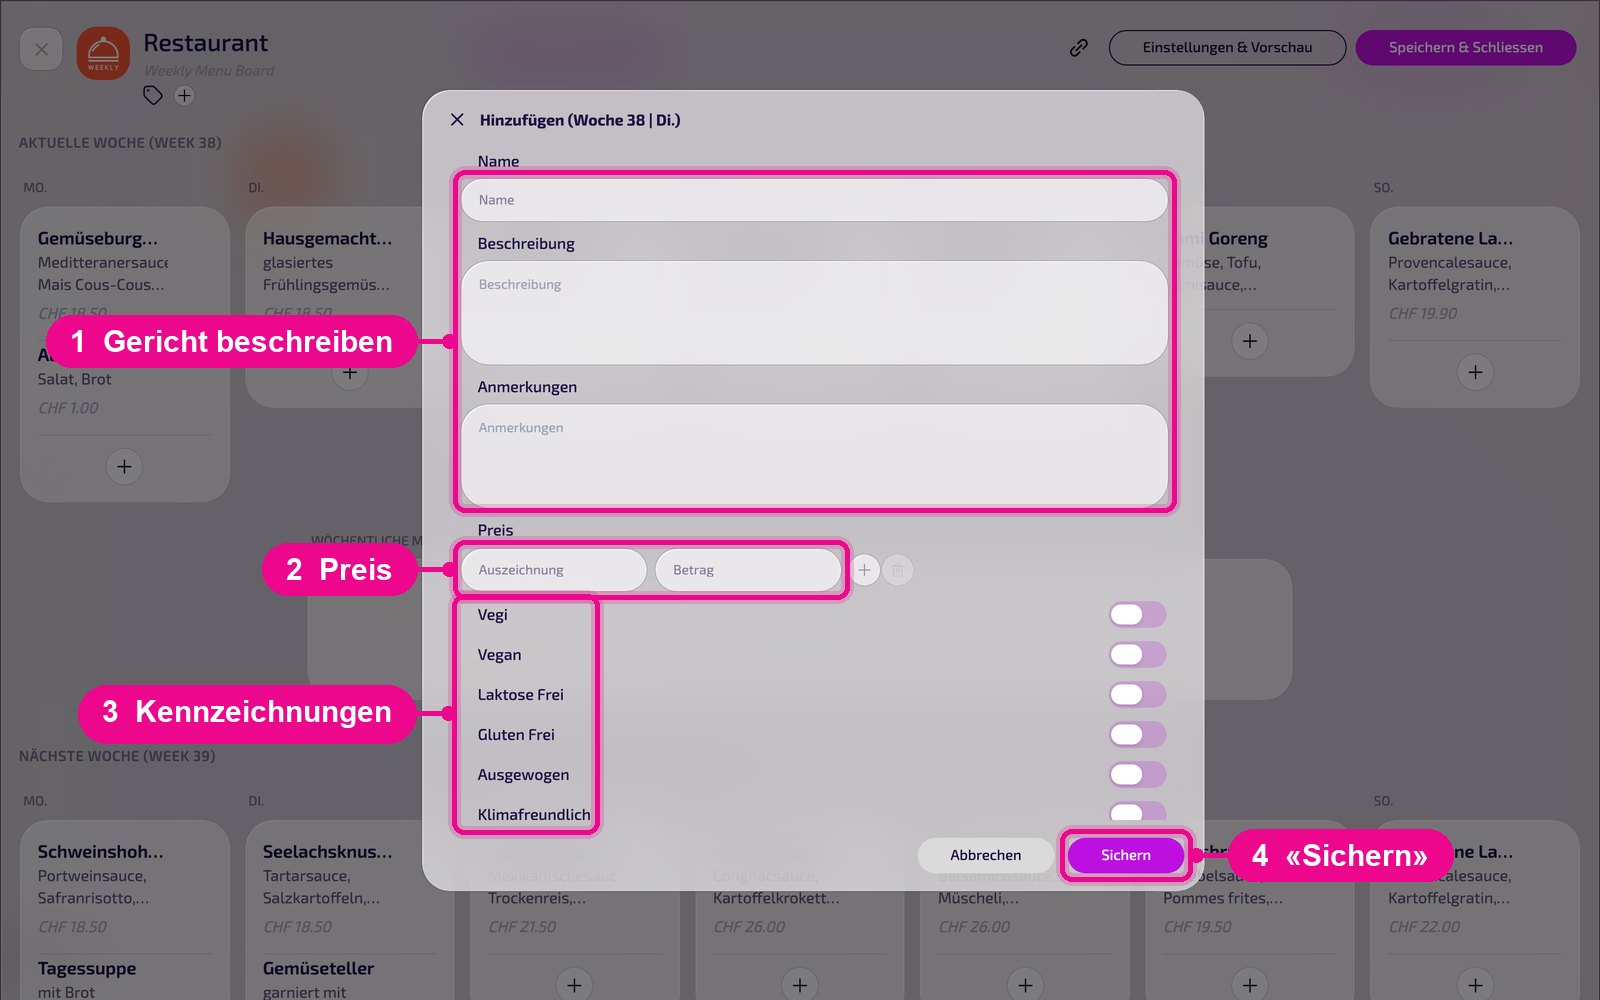
The dishes only appear on the screen once you save the instance with «Speichern & Schliessen» (Save & close).
Configuration in detail
On the left are all settings, on the right you immediately see in the live preview how the instance looks on the screen. With the arrow next to the card you collapse the settings.
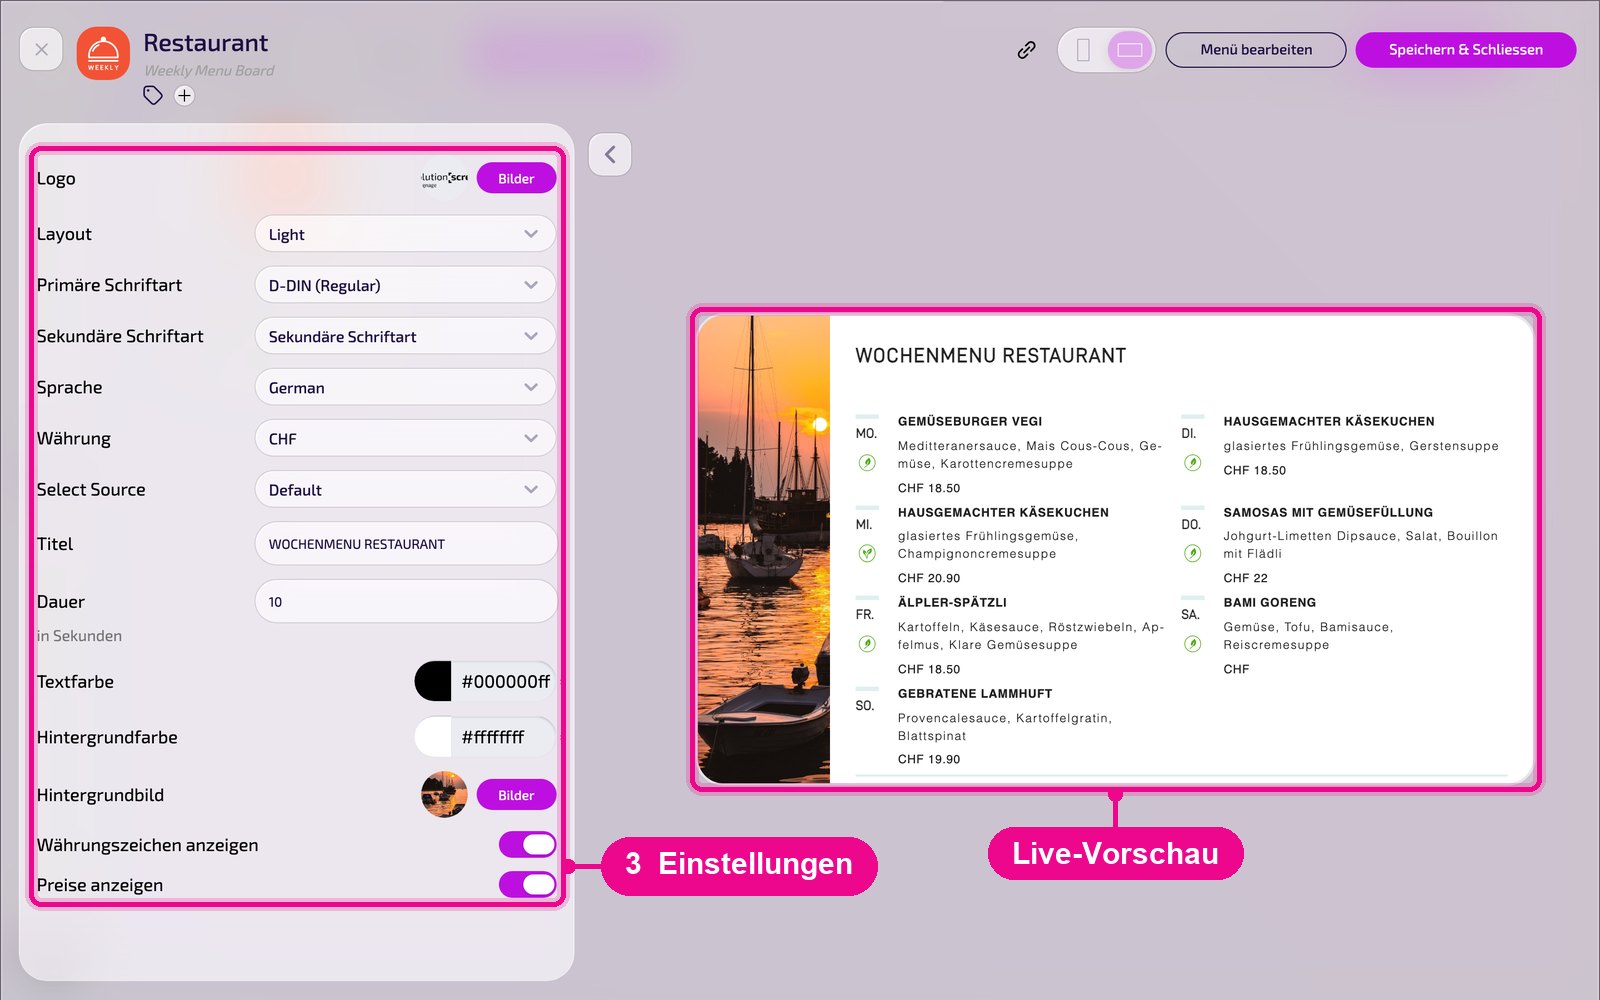
- Logo: choose your own logo via «Bilder» (Images).
- Layout: display template, e.g. «Light» for modern environments or a dark variant for better contrast.
- Primäre / Sekundäre Schriftart: fonts for title and text.
- Sprache: language of the display, e.g. «German».
- Währung: currency of the prices, e.g. «CHF».
- Select Source: source of the menu. «Default» shows the dishes you entered under «Menü bearbeiten» (Edit menu).
- Titel: heading above the menu, e.g. «Wochenmenü» (Weekly menu).
- Dauer: display time in seconds.
- Textfarbe / Hintergrundfarbe: colors for text and background.
- Hintergrundbild: optional image chosen via «Bilder» (Images), e.g. a photo of the restaurant.
- Währungszeichen anzeigen: shows or hides the currency in front of the prices.
- Preise anzeigen: shows or hides the prices.
Save & play out on the screen
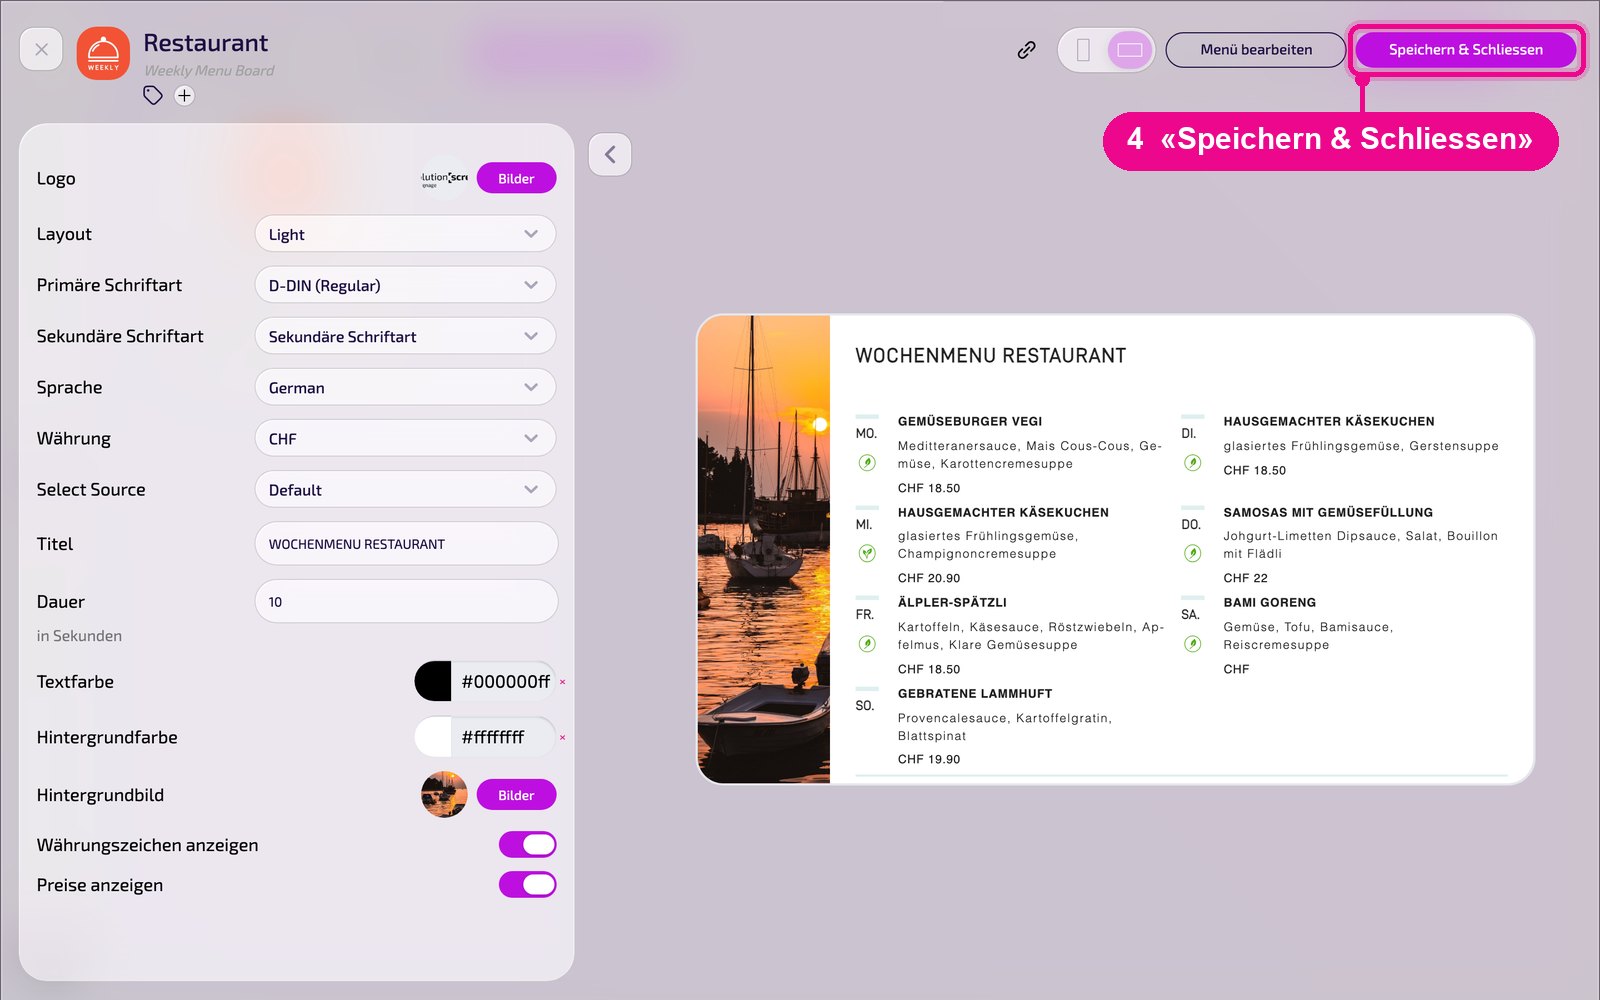
Save the instance at the top right with «Speichern & Schliessen» (Save & close).
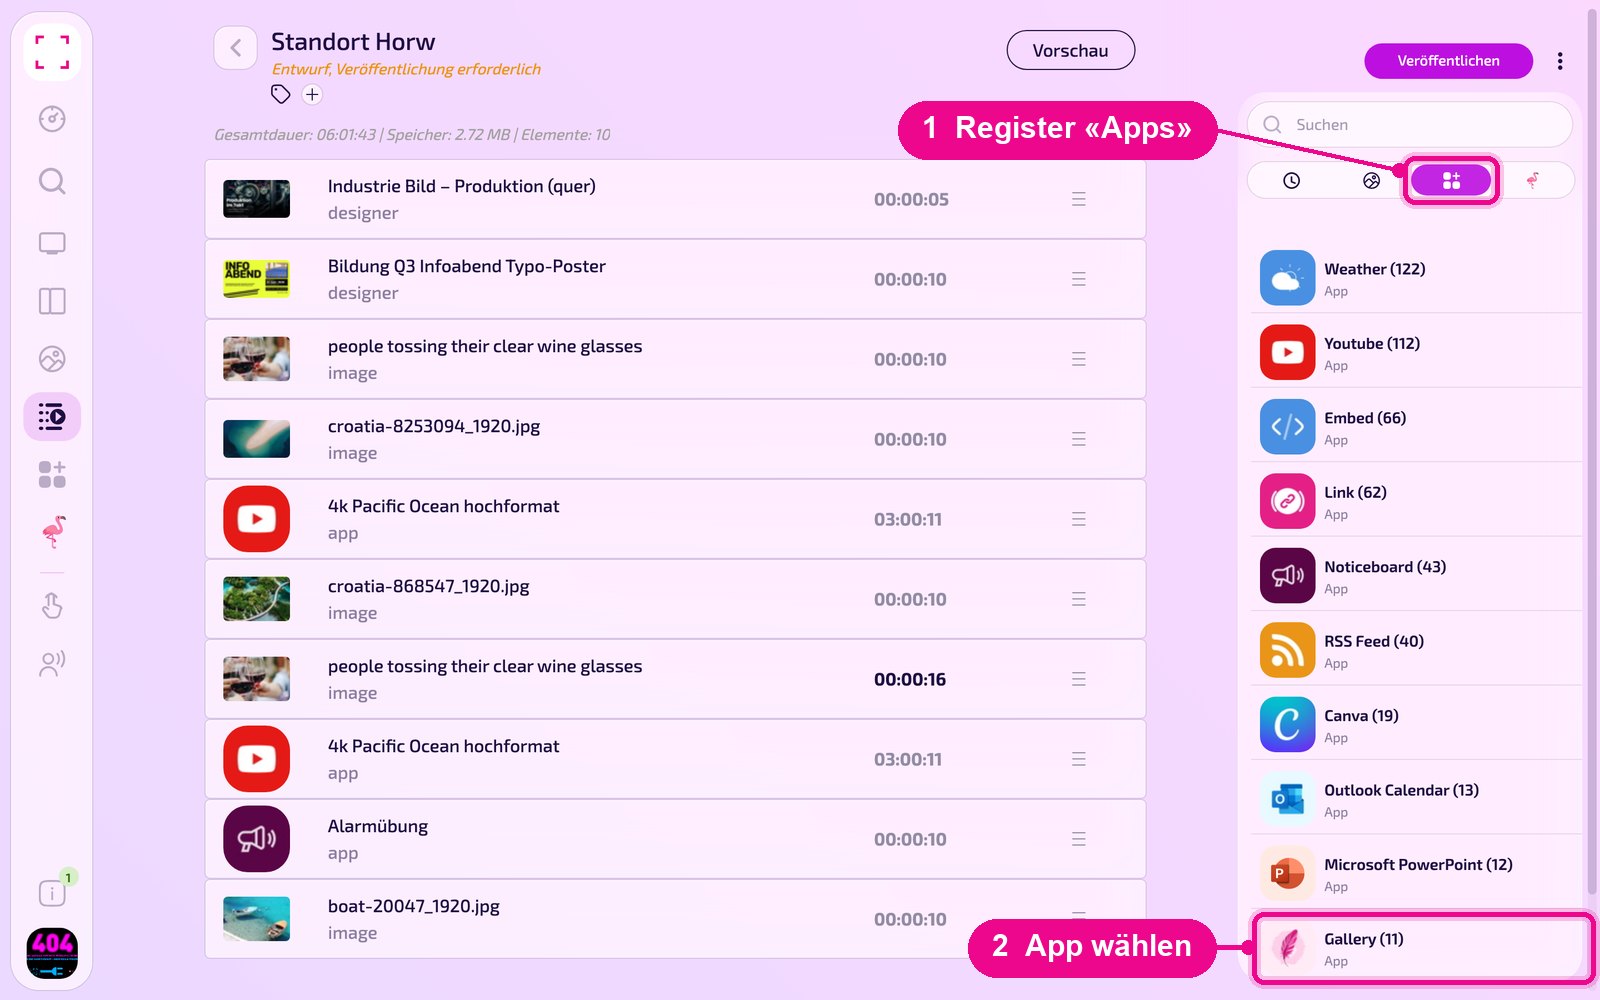
Add to a playlist: Open the playlist, select the «Apps» tab on the right, click the app and then the instance. The instance is added immediately.
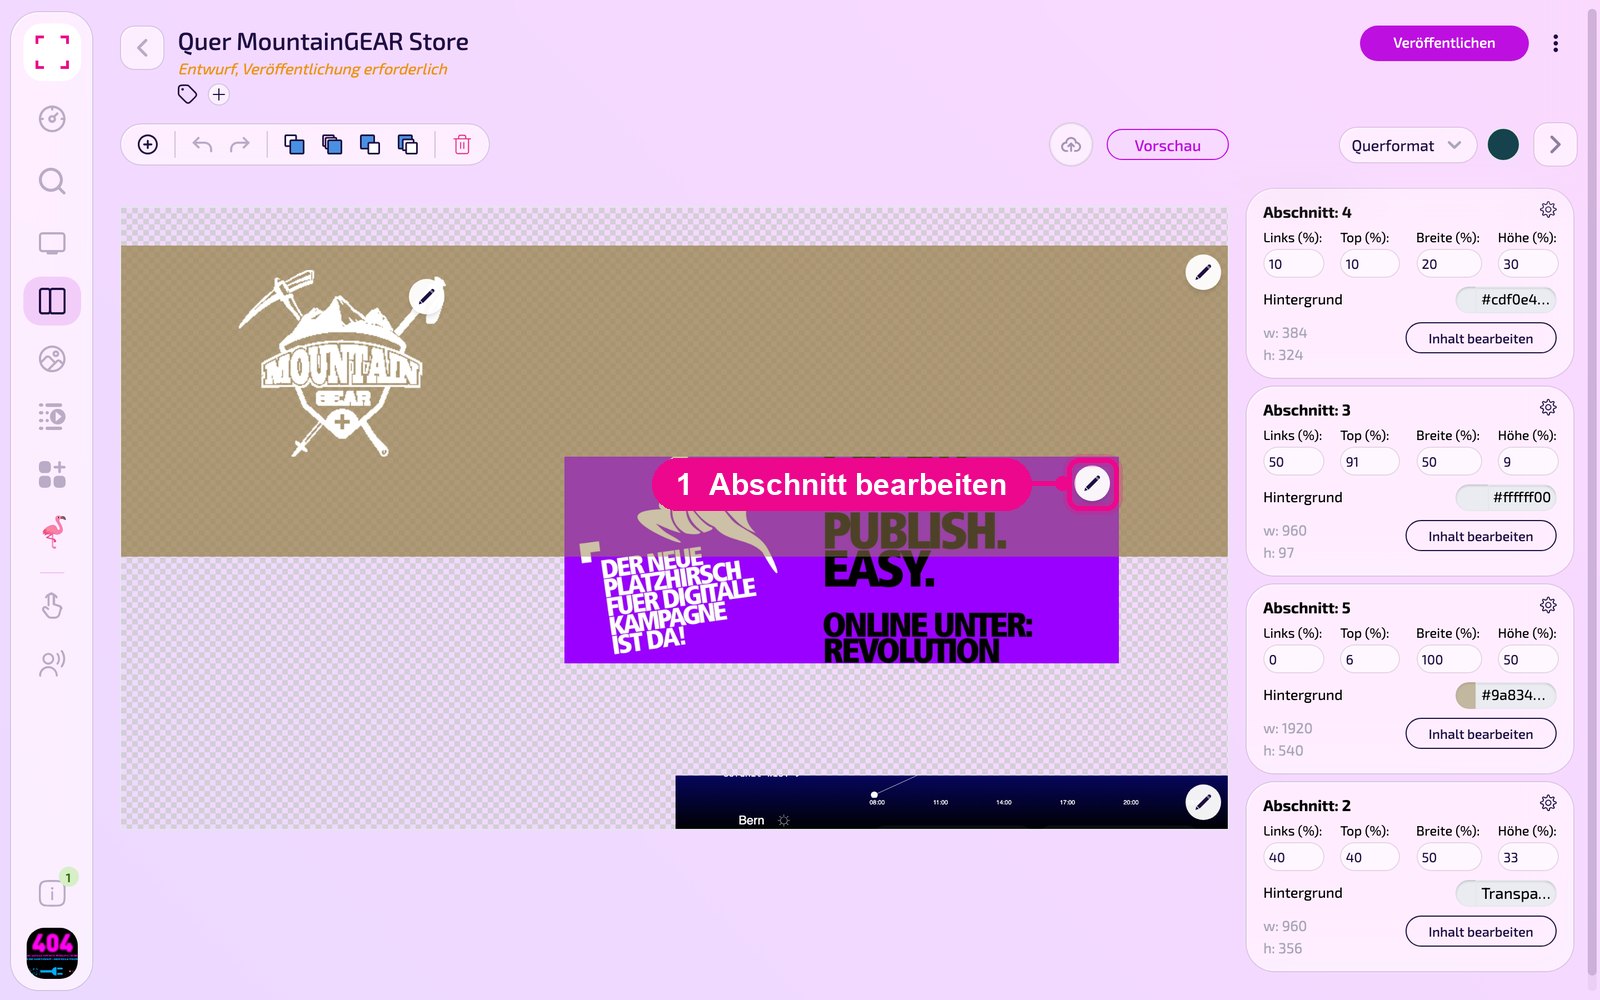
Add to a layout: Open the layout and click the pencil on the desired section.
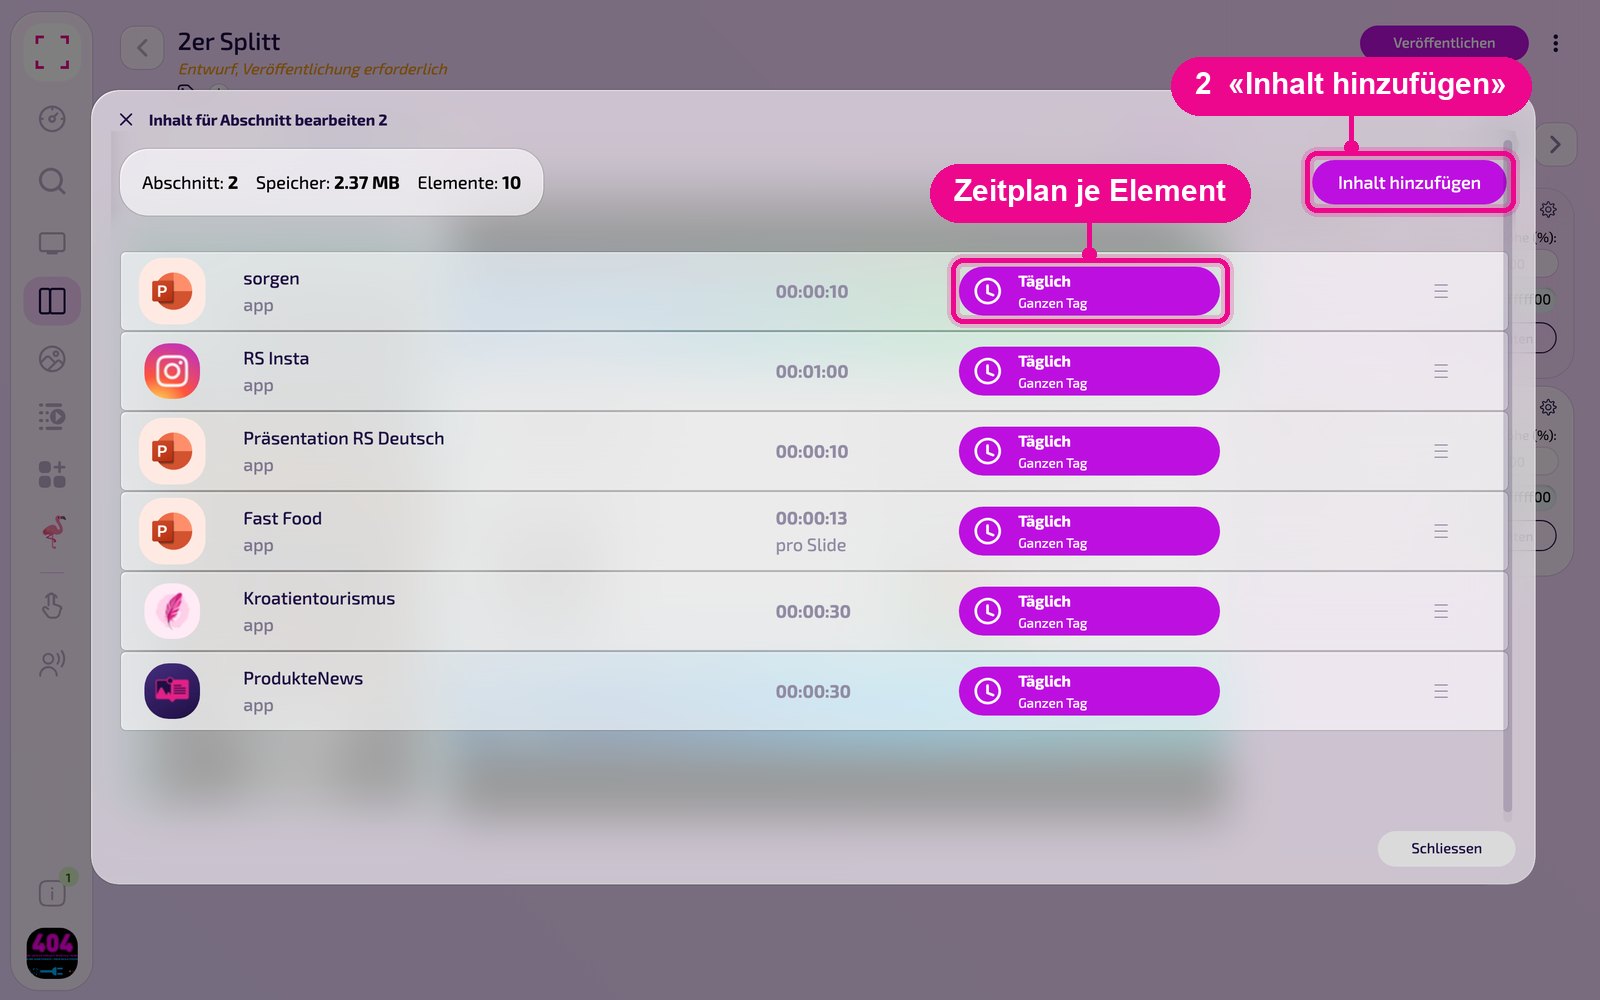
In the «Inhalt für Abschnitt bearbeiten» (Edit content for section) window you add the instance with «Inhalt hinzufügen» (Add content). On the right of each element you set the schedule via «Täglich» (Daily).
Then click «Veröffentlichen» (Publish) in the playlist or layout. As long as it shows «Entwurf, Veröffentlichung erforderlich» (Draft, publishing required), the screen still shows the old state.
Tips & troubleshooting
Menu empty
Enter dishes for the current week via «Menü bearbeiten» (Edit menu) and save the instance.
Wrong currency
Adjust it in the «Währung» (Currency) field or turn off «Währungszeichen anzeigen» (Show currency symbol).
Hard to read
Ensure enough contrast between text and background color; with a background image, prefer a calm motif.
Content does not appear
Check whether the Playlist or Layout is published and assigned to the correct Screen, and whether the Player is online.